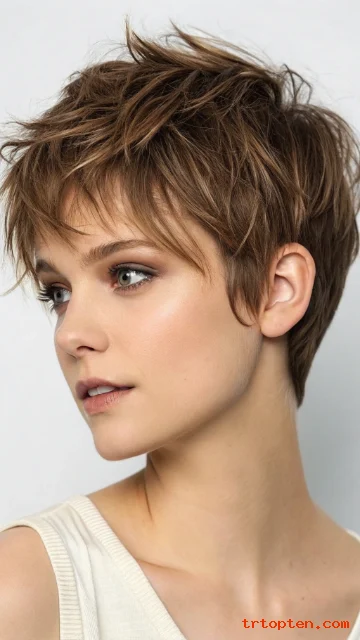
Shaggy pixie styles make short hair feel playful, textured, and easy to wear. This guide shares 27 shaggy pixie styles you can screenshot for your next salon visit.
You will see options for fine hair, thick hair, curls, straight strands, and grown-out pixie phases.
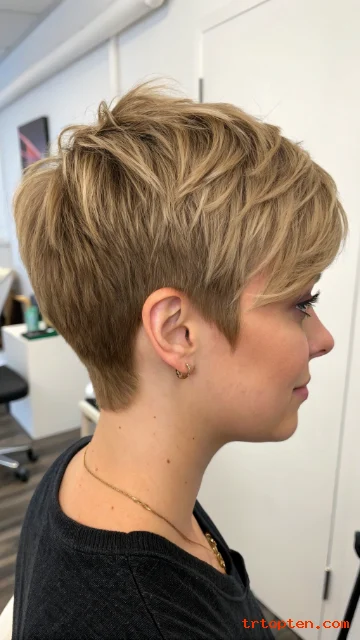
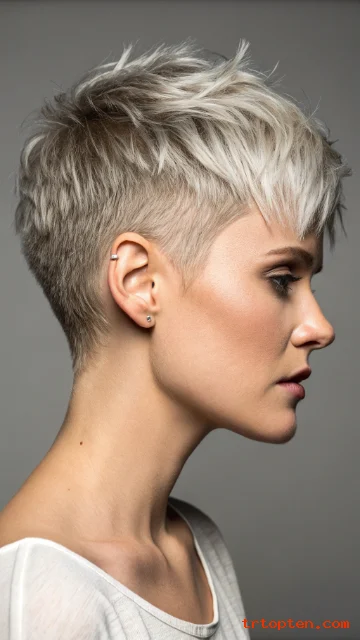
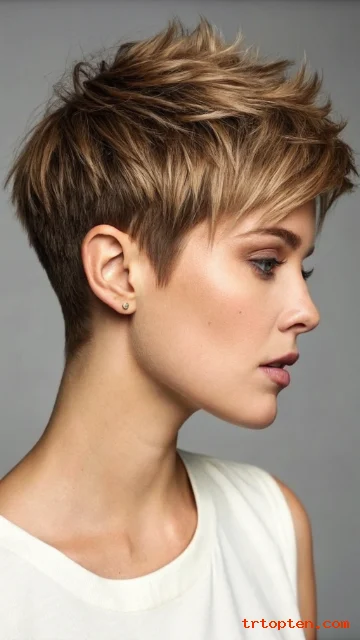
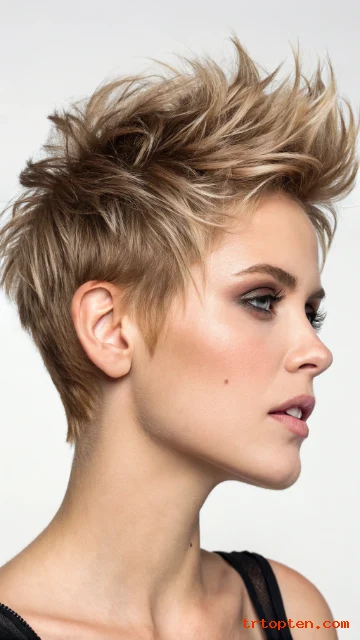
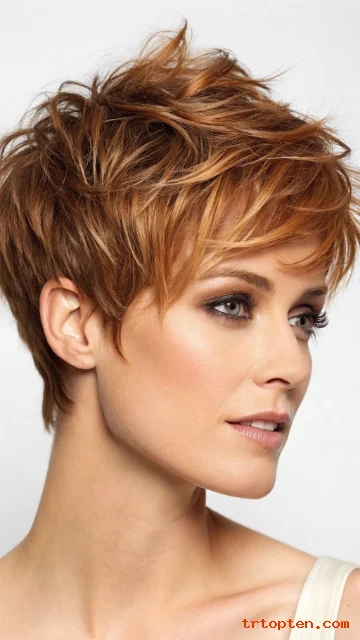
Classic Shaggy Pixie With Choppy Crown
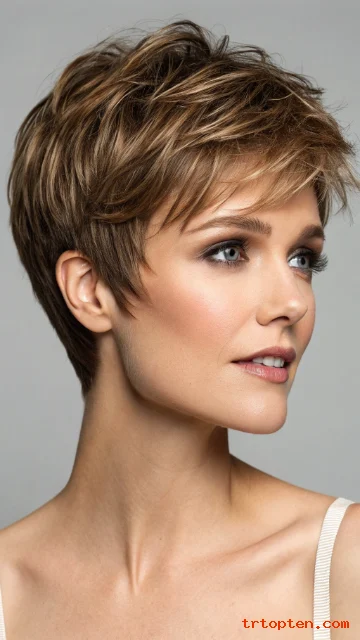
This shaggy pixie keeps the sides neat and adds choppy layers on top. The crown gets lift, so your head shape looks balanced. You can style it fast with a light paste and your fingers.
Ask your stylist for short, broken layers that blend into a soft perimeter. The uneven ends make the cut look modern and not too “perfect.” This style works well for straight to slightly wavy hair.
Use a pea-size texture cream and scrunch at the roots. Blow-dry upward for height, then pinch the ends. Finish with a flexible spray so it stays touchable.
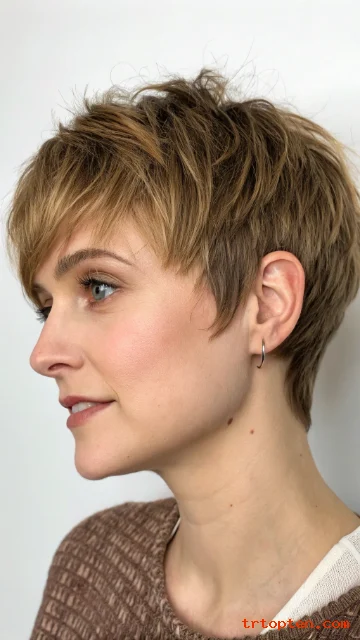
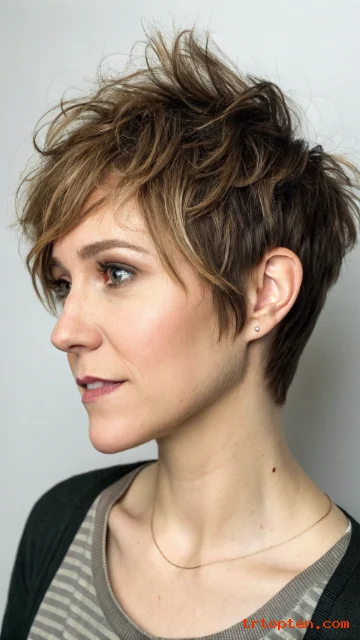
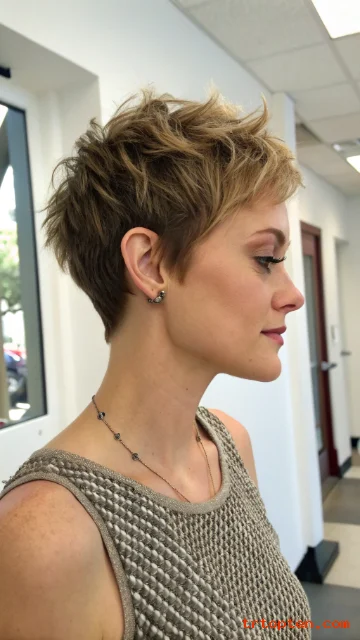
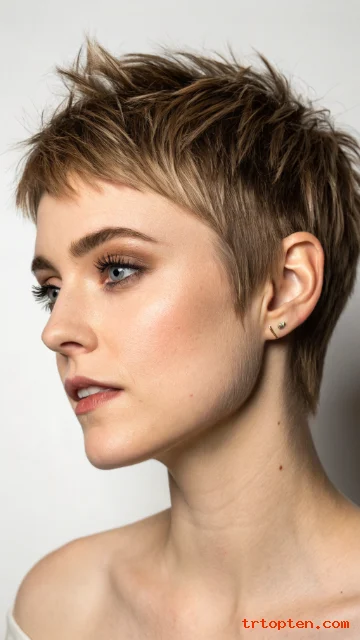
Shaggy Pixie With Wispy Micro Fringe
This cut pairs shaggy layers with a tiny, wispy fringe. The micro fringe draws attention to your eyes and brows. The shag texture keeps it soft, not severe.
Keep the fringe airy and uneven, not a straight block. The top layers should feather forward into the fringe. This look suits oval, heart, and long face shapes.
Style with a small round brush just at the fringe. Use dry shampoo at the roots for grip. Smooth only the very tips so it stays piecey.
Textured Shaggy Pixie With Long Side Bangs
This shaggy pixie adds longer bangs that sweep across the forehead. The side fringe softens strong cheekbones and jawlines. It also gives you more styling options.
Ask for point-cut bangs that blend into the top layers. Keep the sides slightly longer to connect with the fringe. The back stays short for a tidy finish.
Blow-dry bangs with a flat brush and direct them sideways. Add a wax stick to define the ends. Tuck one side behind the ear for contrast.
Shaggy Pixie With Soft Tapered Nape
A tapered nape makes a shaggy pixie look clean from behind. The top stays messy and light, while the neckline stays sharp. This balance looks polished without feeling stiff.
Tell your stylist you want a gentle taper, not a hard undercut. The top layers should stay longer and airy. The perimeter should look soft, not blunt.
Use a blow dryer on low and lift the crown with your fingers. Apply matte clay at the top only. Keep the nape product-free for a crisp edge.
Shaggy Pixie With Piecey Ear Tucks
This style leaves enough length to tuck hair behind the ears. The ear tuck shows earrings and opens the face. The shag layers stop it from looking flat.
Ask for longer side pieces with light layering around the ears. Keep the top textured and slightly forward. The cut should move when you shake it.
Add mousse to damp hair and air-dry for a relaxed finish. Use a small dab of cream on the ear pieces. Tuck both sides for a fresh look.
Shaggy Pixie With Feathered Layers
Feathered layers create soft movement and lightness. The ends look airy, not chunky. This shaggy pixie feels flattering and easy to wear.
Ask for feathering through the top and sides with a razor or point cutting. Keep the layers longer at the crown for lift. The fringe can stay soft and side-swept.
Use a lightweight blow-dry spray and a vent brush. Flip sections in different directions for texture. Finish with a mist of flexible hold spray.
Shaggy Pixie With Mini Shag Mullet Shape
This cut mixes a pixie with a small mullet tail. The top stays short and shaggy, while the back has a little length. It looks edgy but still wearable.
Request short layers on top and a slightly longer back section. Keep the sides tight so the shape stays intentional. Ask for textured ends in the tail.
Scrunch in salt spray and let it air-dry. Add paste to the tail and twist it lightly. Keep the front piecey and separated.
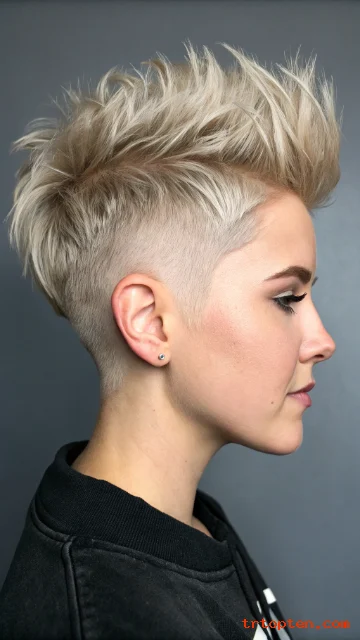
Shaggy Pixie With Subtle Undercut

A subtle undercut removes bulk while keeping a soft outline. The top layers stay shaggy and full of movement. The undercut stays hidden until you style it.
Ask for a low undercut around the nape or behind the ears. Keep the top long enough to cover it. The layers should look choppy, not stacked.
Blow-dry the top forward and then push it back with your hands. Use matte paste to define separation. Show the undercut by tucking one side.
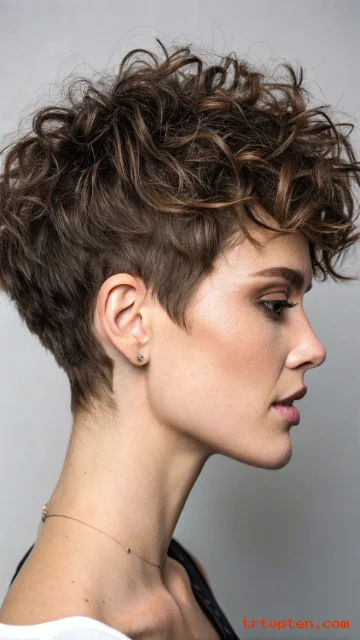
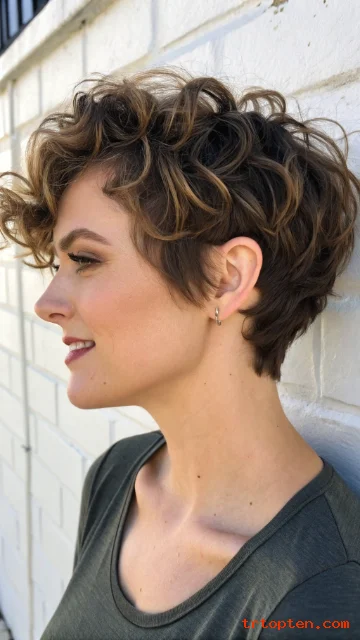
Shaggy Pixie With Curly Top
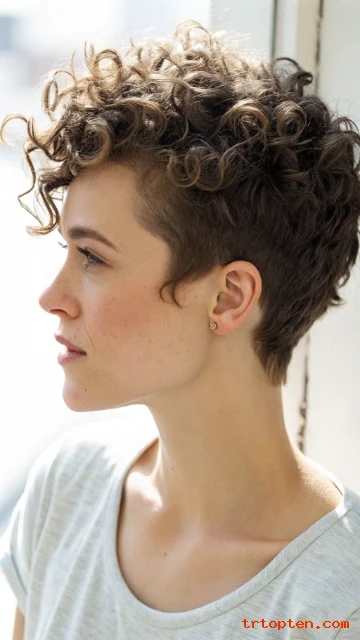
This pixie celebrates curls and keeps the shape light. The sides stay shorter to frame the face. The curly top gives height and a playful finish.
Ask for curl-by-curl shaping on top and controlled taper on the sides. Keep the crown layers rounded so curls sit nicely. Avoid heavy thinning that breaks curl pattern.
Apply curl cream to soaking wet hair and scrunch gently. Diffuse on low heat to keep volume. Finish with a light oil on the ends.
Shaggy Pixie for Fine Hair With Lifted Roots
Fine hair loves a shaggy pixie because layers create lift. The cut adds shape without needing heavy styling. The result looks fuller and airy.
Ask for short layers at the crown and a soft fringe. Keep the ends slightly jagged for texture. Avoid too much length on the sides, which can fall flat.
Use volumizing mousse at the roots and blow-dry upward. Add dry shampoo for grip and lift. Finish with a light texture spray to keep movement.
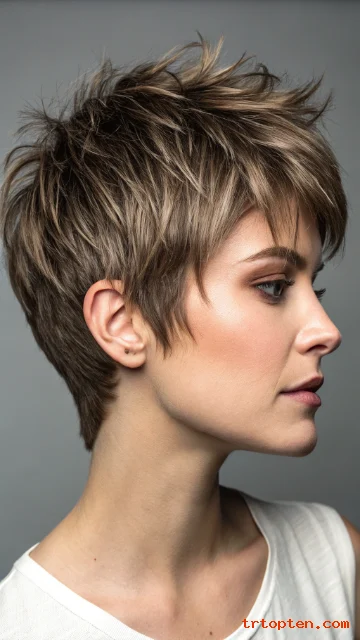
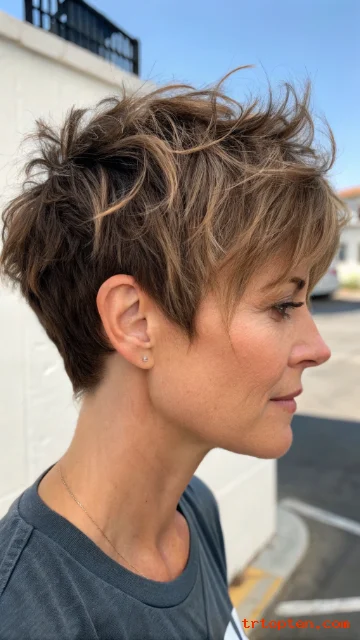
Shaggy Pixie for Thick Hair With Debulked Ends
Thick hair can feel heavy in short cuts, so debulking helps. A shaggy pixie removes weight and keeps the shape light. The ends look piecey and controlled.
Ask for internal layering and textured ends through the top and sides. Keep the perimeter soft so it does not “puff.” A tapered nape will also reduce bulk.
Use smoothing cream on damp hair, then rough-dry. Add matte clay only where you need control. Pinch the ends to separate pieces.
Shaggy Pixie With Side Part and Tousled Top
A side part gives structure, while the top stays messy. This style looks casual but intentional. It also helps you direct volume where you want it.
Ask for longer top layers that can flip over the part line. Keep the sides shorter for contrast. The fringe should blend into the top layers.
Blow-dry using your fingers and set the part last. Add texture powder at the crown. Rake a small amount of paste through the top.
Shaggy Pixie With Soft Curtain Fringe
Curtain fringe in a pixie looks fresh and face-framing. The shag layers help the fringe blend smoothly. It gives a gentle, romantic vibe in short hair.
Ask for longer fringe that splits softly in the center. Keep the top layered but not too short. The sides should connect to the fringe with light graduation.
Use a small round brush to shape the fringe away from the face. Add a light cream to keep it flexible. Finish with a touch of shine spray on the fringe only.
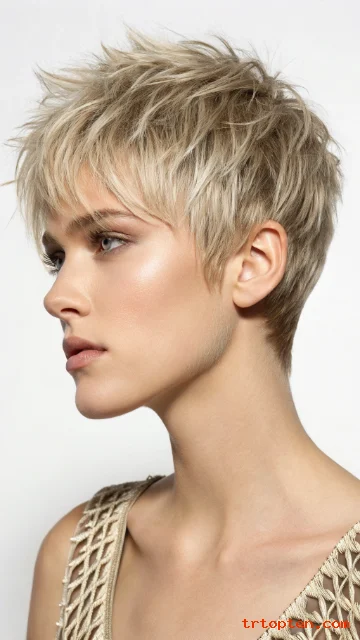
Shaggy Pixie With Razor Texture
Razor texture makes the ends look airy and modern. The cut feels lighter and more flexible. It works well if you like a lived-in look.
Ask for razor-cut layers through the top and fringe. Keep the nape tidy to avoid a messy outline. The stylist should keep the layers soft, not shredded.
Use a sea salt spray and scrunch while drying. Add a little cream to calm flyaways. Keep the finish matte for that undone vibe.
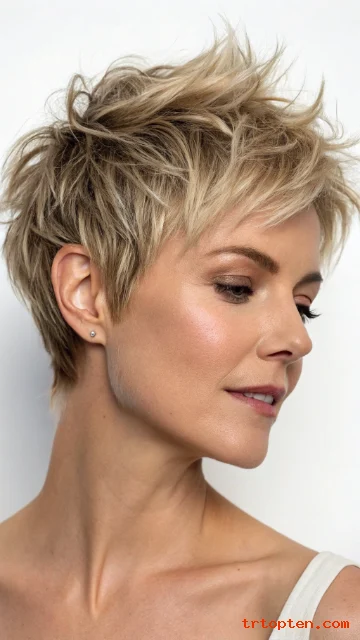
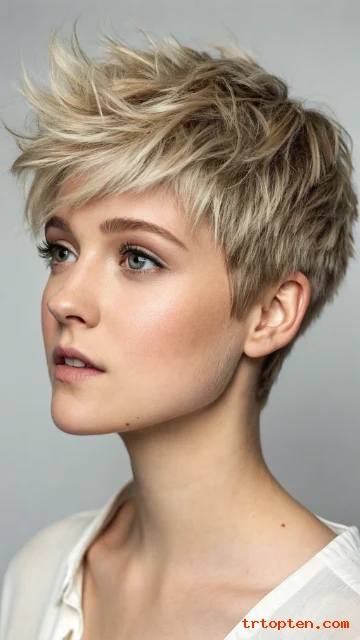
Shaggy Pixie With Spiky Pieces
Spiky pieces add attitude and height. The shag layers make the spikes look soft, not stiff. This style works best with short top layers.
Ask for shorter layers at the crown with choppy, separated ends. Keep the sides neat so the spikes stand out. A short fringe can be textured forward.
Dry hair upward with a blow dryer and fingers. Apply a small amount of strong-hold paste and pinch spikes. Finish with a light mist of hairspray.
Shaggy Pixie With Longer Front Pieces
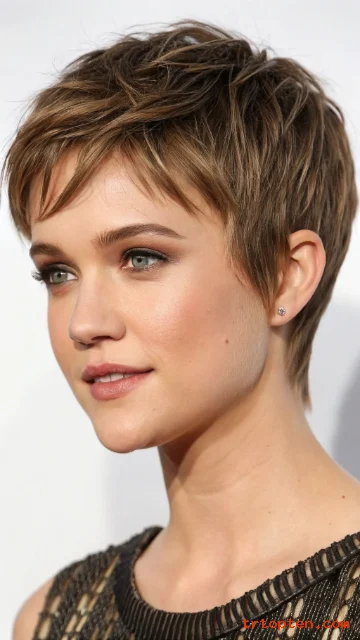
Longer front pieces create a slimming frame around the face. The back stays short, so the cut still feels like a pixie. The shag texture keeps the front from looking heavy.
Ask for elongated face-framing pieces that start near the cheekbones. Keep the top layered and slightly forward. The nape should be short and clean.
Smooth the front pieces with a tiny bit of cream. Add texture to the top with dry spray. Tuck one side to show the contrast.
Shaggy Pixie With Wavy Texture
Waves make a shaggy pixie look soft and relaxed. The cut enhances natural bend and movement. It looks great with minimal effort.
Ask for layered shaping that supports your wave pattern. Keep the ends point-cut for softness. A side-swept fringe blends nicely with waves.
Apply mousse and twist small sections while damp. Air-dry or diffuse on low. Finish with texture spray and gentle scrunching.
Shaggy Pixie With Textured Bowl-Inspired Top
This modern take uses a rounded top but keeps it shaggy. The texture breaks up the shape so it looks current. The sides stay tight for balance.
Ask for a softly rounded top with choppy layers to avoid a blunt line. Keep the fringe short-to-medium and uneven. The sides and nape should be tapered.
Use a smoothing primer, then rough-dry the top. Add paste and rake it through to break up the roundness. Keep the finish matte and piecey.
Shaggy Pixie With Side-Swept Baby Bangs
Baby bangs can look bold, but shag layers soften them. The fringe sits short and light. The rest of the cut stays airy and textured.
Ask for short bangs with uneven edges that sweep slightly to one side. Keep the top layers choppy and forward. The sides should stay close to the head.
Blow-dry the bangs with a small brush and slight curve. Add a tiny bit of wax to separate the fringe. Fluff the crown for a balanced look.
Shaggy Pixie With Defined Ends for Straight Hair
Straight hair can look sleek, so defined ends add interest. The shaggy pixie creates movement without needing curls. It looks modern and sharp.
Ask for choppy ends and light layers through the crown. Keep the fringe soft and broken. A tapered nape keeps the outline clean.
Use a flat iron only on a few pieces to bend ends slightly. Apply a dry wax to define separation. Keep volume at the crown with light teasing.
Shaggy Pixie With Salt-and-Pepper Texture
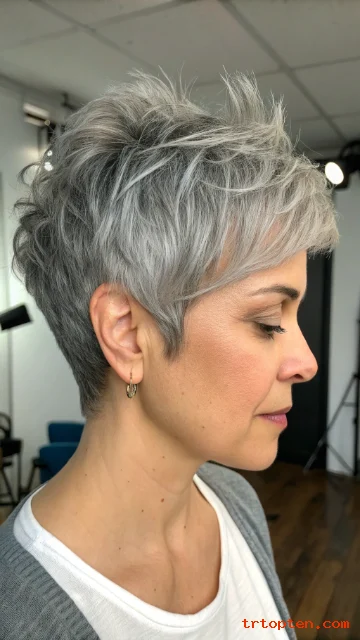
Natural gray looks amazing with shag texture. The layers show dimension and shine in mixed tones. This cut feels confident and low-fuss.
Ask for layered texture that enhances your natural pattern. Keep the top slightly longer so the color variation shows. A soft fringe can frame the eyes.
Use silver-safe styling cream and scrunch lightly. Blow-dry on low to avoid frizz. Finish with a light gloss spray for shine.
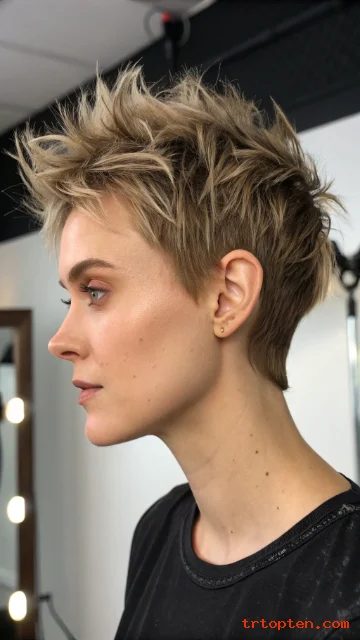
Shaggy Pixie With Bold Side Volume
This style builds volume on one side for drama. It creates an asymmetrical look without extreme cutting. The shag layers make the volume look natural.
Ask for longer top layers that can sweep to one side. Keep the opposite side slightly shorter. The crown should be layered for lift.
Blow-dry in the direction you want volume, then set with a cool shot. Add texture powder near the roots. Pinch the ends with paste for definition.
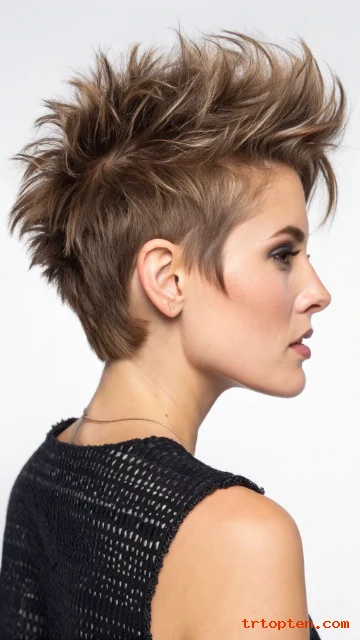
Shaggy Pixie With Soft Mohawk Shape
A soft mohawk pixie keeps height through the center. The sides stay shorter but not shaved. The shag texture keeps it wearable and not too harsh.
Ask for longer center layers from forehead to crown. Keep the sides shorter and blended. The back should taper so the center stands out.
Blow-dry the center upward and slightly back. Use a firm paste and pinch sections. Keep the sides smooth with a light cream.
Shaggy Pixie With Fringe and Crown Shag Layers
This cut focuses texture at the crown and fringe. The top looks full and playful. The sides and back stay simple.
Ask for extra choppy layers at the crown with a textured fringe. Keep the perimeter soft and neat. The goal is lift at the top with a clean outline.
Use volumizing spray at the crown and blow-dry upward. Add paste to the fringe and pinch for separation. Finish with light hairspray to hold shape.
Shaggy Pixie With Soft Face-Framing Shards
Face-framing shards are thin, longer pieces near the cheeks. They soften the look and add movement. The shaggy pixie stays light and modern.
Ask for delicate face-framing pieces that sit near the cheekbones. Keep the top choppy and the sides blended. The nape should be tapered for a clean finish.
Use a small amount of cream on the shards to keep them smooth. Add texture spray to the top for lift. Style the shards forward or tuck them back.
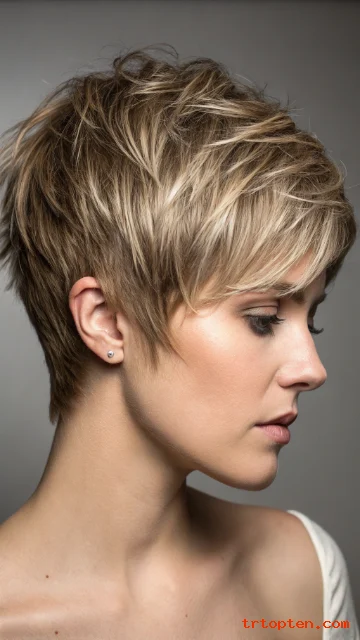
Shaggy Pixie With Warm Highlights and Texture
Highlights make shag layers pop. The light tones show each piece and add depth. This style looks bright and fresh without extra length.
Ask for subtle warm highlights focused on the top and fringe. Keep the cut choppy so the color placement looks textured. The sides should stay slightly darker for contrast.
Use a color-safe texture spray and scrunch the top. Blow-dry quickly with fingers for separation. Add a tiny bit of shine serum to highlighted pieces.
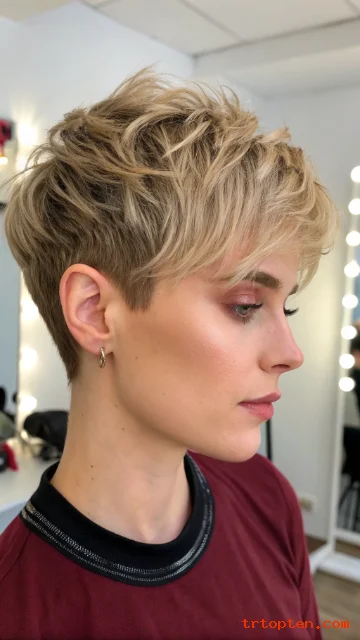
Grown-Out Shaggy Pixie With Messy Layers
A grown-out pixie can look amazing with shag layers. The extra length gives movement and a relaxed feel. It is perfect if you are between trims.
Ask for reshaping that keeps length but adds choppy layers. Keep the ends textured so it does not look bulky. A longer fringe can blend into the sides.
Use leave-in conditioner for softness, then add mousse for shape. Air-dry for a casual finish. Pinch ends with a light paste for piecey texture.
What makes shaggy pixie styles different from a regular pixie?
Shaggy pixie styles use choppy layers and textured ends. A regular pixie often has cleaner lines and smoother blending. The shaggy version looks more lived-in and piecey.
Are shaggy pixie styles good for thin hair?
Yes, shaggy layers can add lift and make hair look fuller. Short crown layers create volume at the roots. Use lightweight products so hair stays airy.
Do shaggy pixie styles work on curly hair?
Yes, curly hair looks great with a shaggy pixie shape. The key is curl-friendly layering and careful shaping. Use curl cream and a diffuser for definition.
How often should I trim a shaggy pixie?
Most people trim every 4 to 8 weeks to keep the shape. A softer shaggy look can stretch longer between trims. Your nape and fringe usually need touch-ups first.
What styling product works best for a shaggy pixie?
Texture paste, matte clay, and sea salt spray work well for separation. Fine hair often likes mousse and dry shampoo for lift. Choose flexible hold so the cut stays touchable.
Can I wear shaggy pixie styles with glasses?
Yes, the cut can frame glasses nicely. Ask for soft pieces around the temples so frames do not push hair out. A side-swept fringe can balance the look.
Which face shapes suit shaggy pixie styles?
Most face shapes can wear them with the right fringe and length. Side bangs soften square shapes, and crown lift can balance round shapes. Your stylist can adjust the perimeter and fringe to fit you.
Is a shaggy pixie high maintenance?
The cut is often low maintenance because texture looks good slightly messy. You may style it in five minutes with the right product. Frequent trims keep it looking sharp.
Can I grow out a shaggy pixie without awkward stages?
Yes, shaggy layers help the grow-out look intentional. Ask for reshaping trims that keep movement and remove bulk. Longer fringe and textured ends make the transition easier.
Conclusion
These 27 shaggy pixie styles give you texture, movement, and an easy daily routine. Choose a version that fits your hair type, your face shape, and your styling time.
Bring your favorite photo to the salon and ask for choppy layers, soft blending, and piecey ends, then enjoy a short cut that feels fresh every day.