A smart craft room can also work as a productive office, and these 25 home office craft room ideas can help you plan a space that feels useful, calm, and inspiring.
You do not need a huge room to make this setup work. You need clear zones, smart storage, good lighting, and furniture that supports both work and creativity.
Create a Dual-Purpose Desk and Craft Table
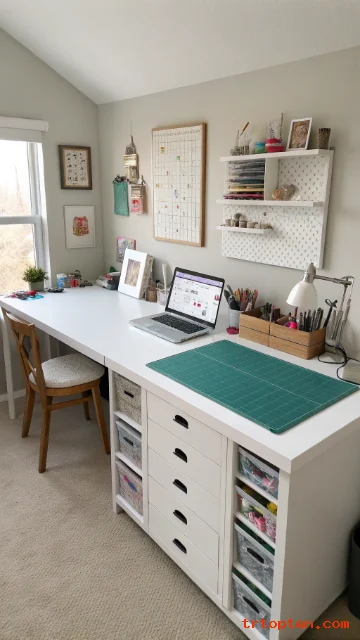
A large desk can serve as your main work area during office hours and your craft table after work. Choose a wide surface that gives you space for a laptop, planner, cutting mat, supplies, and a task lamp.
Use drawers, rolling carts, or under-desk bins to keep office tools separate from craft supplies. This simple division helps you switch tasks without clearing the whole table every time.
Pick a desk with a clean finish, strong legs, and enough depth for both typing and crafting. A neutral wood or white desk works well because it blends with many decor styles.
Use Wall Shelves Above the Desk
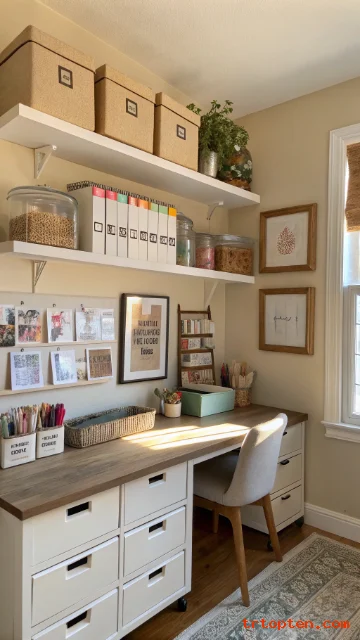
Wall shelves save floor space and keep important items within reach. Place books, paper stacks, jars, baskets, and small decor pieces on the shelves.
Use matching bins or labeled boxes to reduce visual clutter. A clean shelf system helps the room feel calm even when you own many supplies.
Install shelves above your desk at a comfortable height so you can reach items without standing on a chair. Leave some open space between objects so the wall does not look crowded.
Add a Pegboard Craft Wall
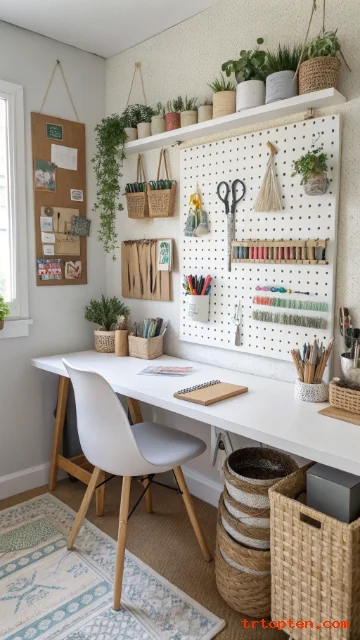
A pegboard gives you flexible storage for tools, scissors, tape, rulers, thread, and small baskets. You can move hooks and holders as your projects change.
Paint the pegboard in a soft color that matches your room. White, sage green, blush, or light blue can make the wall look fresh and organized.
Place the pegboard near your desk or craft table for easy access. Keep the most-used items at eye level so your workflow stays smooth.
Set Up a Rolling Craft Cart
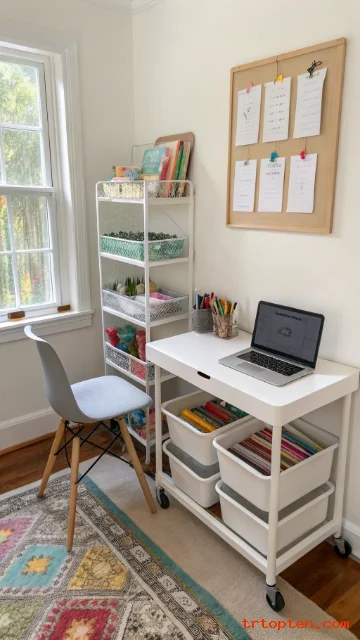
A rolling cart works well in a small home office craft room because you can move supplies where you need them. Store paints, paper, vinyl, yarn, glue, and notebooks on different tiers.
Use clear cups, small bins, and labels to keep each shelf organized. This system helps you find supplies fast and clean up quickly after each project.
Park the cart beside your desk during craft time and slide it into a corner when you need office space. Choose a cart with locking wheels for better stability.
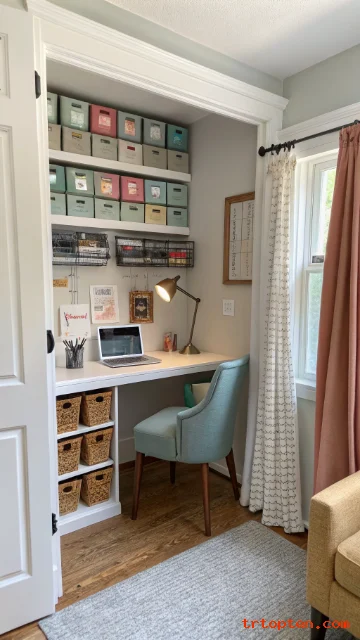
Build a Closet Craft Office
A closet can become a compact office and craft zone with the right shelves and desk surface. Remove the doors or use curtains to make the space feel open.
Install a desktop inside the closet and add shelves above it for supplies. Use baskets and boxes to group tools by project type.
This idea works well in bedrooms, guest rooms, or apartments. Close the curtain when you want the room to look neat in seconds.
Use Clear Storage Bins
Clear bins help you see your supplies without opening every container. They work well for fabric, ribbon, paper, stickers, stamps, and seasonal craft items.
Choose stackable bins to make the best use of vertical space. Add labels to the front so every item has a clear home.
Place heavier bins on lower shelves and lighter bins on top shelves. This setup keeps your office craft room safe, clean, and easy to maintain.
Add a Fold-Down Craft Table
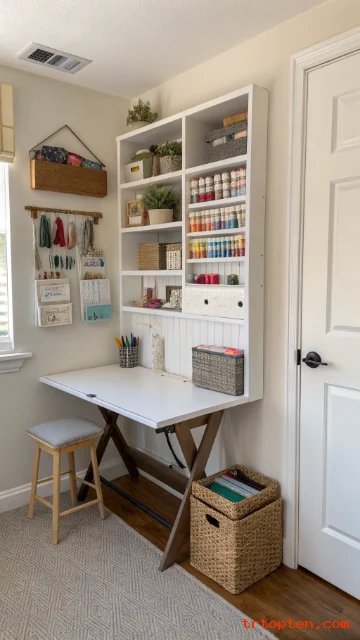
A fold-down table gives you extra work surface without taking over the room. Mount it on the wall and fold it up when you finish your project.
This idea suits small rooms, apartments, and shared home offices. You can use it for cutting paper, wrapping gifts, painting, sewing, or sorting supplies.
Keep a slim stool or folding chair nearby to save more space. Add a small shelf above the table for tools you use often.
Create a Sewing and Computer Zone
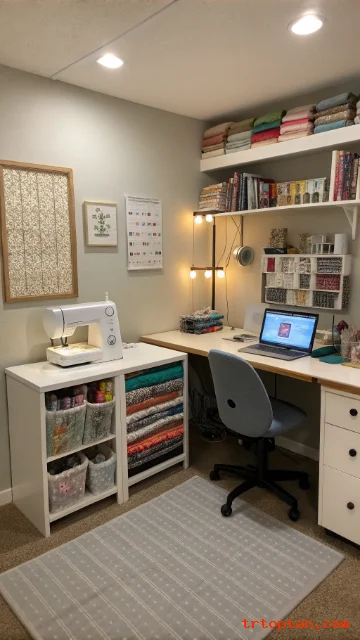
A sewing machine and computer can share one room when each station has a clear purpose. Place the sewing table on one side and the office desk on the other side.
Use separate storage for sewing tools and work documents. This keeps thread, fabric, patterns, and pins away from laptops and paperwork.
Add strong task lighting above the sewing machine to protect your eyes. Keep a small trash bin nearby for thread clippings and fabric scraps.
Use a Corner Desk Layout
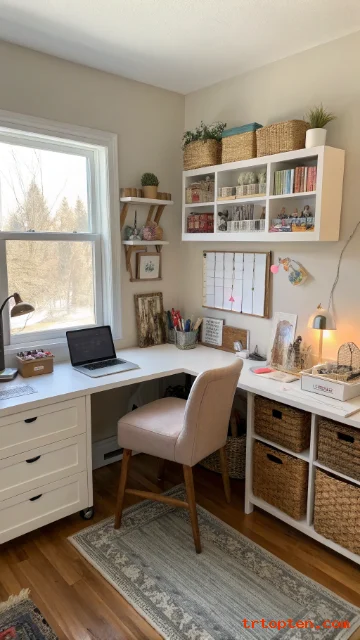
A corner desk uses an empty corner and creates a natural work zone. It gives you two connected surfaces for office tasks and craft projects.
Place your computer on one side and craft supplies on the other side. This setup gives each task its own space without needing two full desks.
Add corner shelves above the desk to hold baskets, books, and tools. A corner layout can make a small room feel more efficient and balanced.
Add Built-In Cabinets
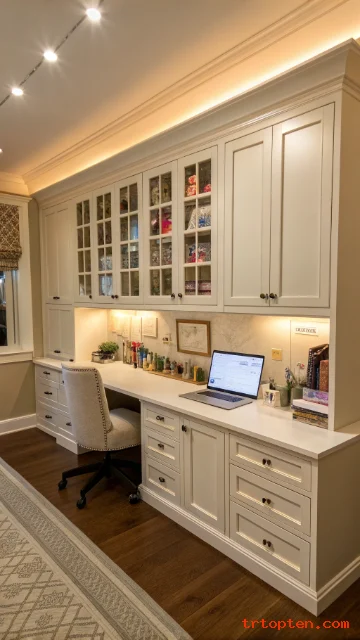
Built-in cabinets make a home office craft room look polished and organized. They hide supplies, paperwork, machines, and unfinished projects behind closed doors.
Use upper cabinets for lightweight items and lower cabinets for heavy supplies. Add drawers for scissors, pens, glue sticks, cords, and small tools.
A built-in setup works well if you want a permanent craft office. Choose simple cabinet fronts to keep the room clean and timeless.
Make a Paper Craft Station
A paper craft station helps you store cardstock, scrapbook paper, cutters, stamps, and stickers in one area. Use vertical paper holders to keep sheets flat and easy to browse.
Place a cutting mat on the desk so you can protect the surface. Keep paper trimmers, rulers, and adhesive in a nearby drawer or caddy.
This setup works well for card making, scrapbooking, journaling, and gift tags. Use color-coded folders to sort paper by shade or theme.
Use Drawer Dividers for Small Supplies
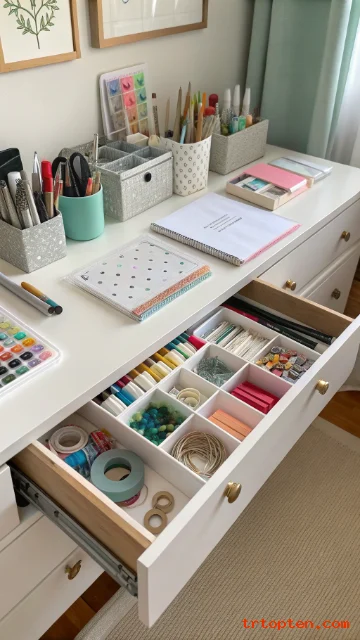
Drawer dividers stop small craft and office items from turning into clutter. They work well for pens, clips, needles, beads, stickers, tapes, and labels.
Choose adjustable dividers so you can change the layout later. Clear trays also help you see every item when you open the drawer.
Keep your most-used tools in the top drawer near your chair. Store backup supplies in lower drawers so your main workspace stays light and clean.
Add a Cozy Reading and Planning Nook
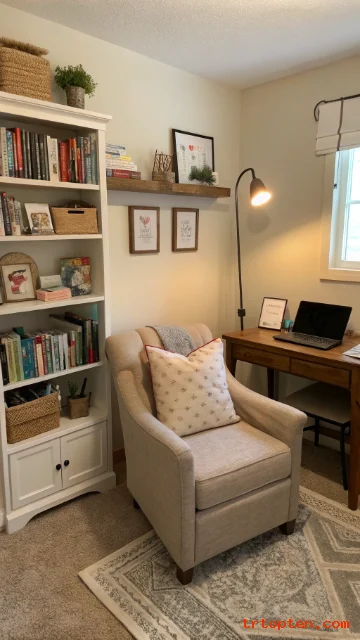
A small chair can turn your craft office into a relaxing planning area. Use this nook for sketching ideas, reading craft books, checking notes, or planning your week.
Place a small side table beside the chair for a notebook and coffee mug. Add a floor lamp so the nook works well in the evening.
This space gives your room a softer feeling and helps you pause between tasks. A cozy nook can also make the room feel less like a storage area.
Use Vertical Fabric Storage
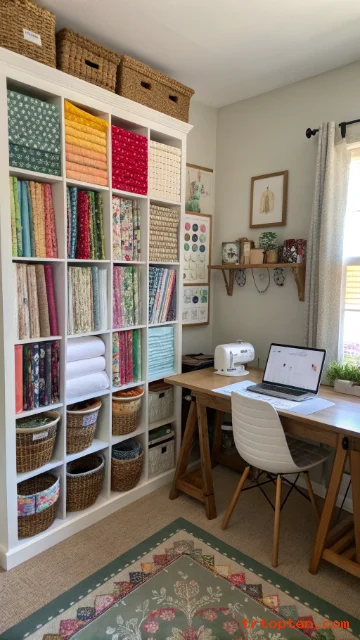
Fabric can take over a room if you store it in piles. Fold fabric around boards or place it upright in cubbies so you can see each pattern.
Sort fabric by color, type, or project. This method helps you find the right material without pulling everything out.
Place fabric storage near your sewing or craft table. Keep delicate fabric in closed bins to protect it from dust and sunlight.
Install Good Task Lighting
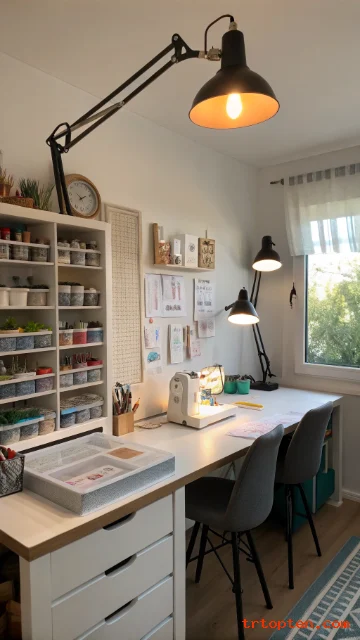
Good lighting helps you work longer without eye strain. Use a desk lamp, overhead light, and natural light when possible.
Place task lamps near your computer, sewing machine, cutting mat, or painting area. Choose adjustable lamps so you can direct light exactly where you need it.
Warm white bulbs can make the room feel cozy, while bright white bulbs can help with detailed work. Use both types if your room supports office work and craft projects.
Create a Cricut or Cutting Machine Station
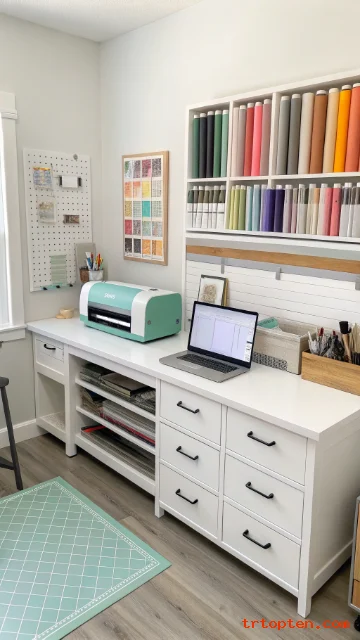
A cutting machine needs a stable surface and room for mats to move in and out. Place the machine on a sturdy desk, cabinet, or cart with open space behind it.
Store vinyl, transfer tape, tools, and mats near the machine. Use vertical racks or drawers to keep sheets flat and easy to reach.
Keep your computer or tablet close so you can send designs to the machine without moving around the room. This setup saves time and keeps projects simple.
Use a Large Bulletin Board
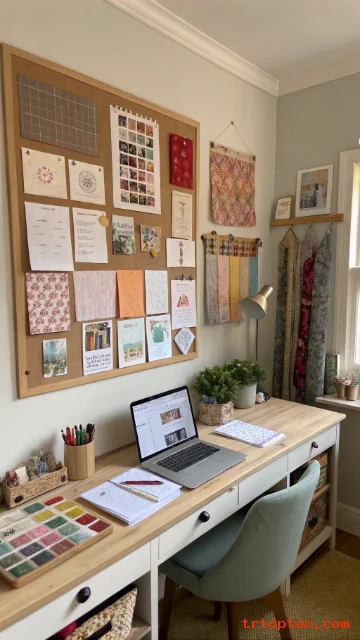
A bulletin board gives you a place to pin ideas, schedules, samples, and reminders. It can hold mood boards, fabric swatches, color palettes, and project notes.
Place the board above your desk or beside your craft table. Keep it neat by removing old notes once a project ends.
Use matching pins, clips, or mini baskets to make the board look tidy. A well-styled board can become both storage and decor.
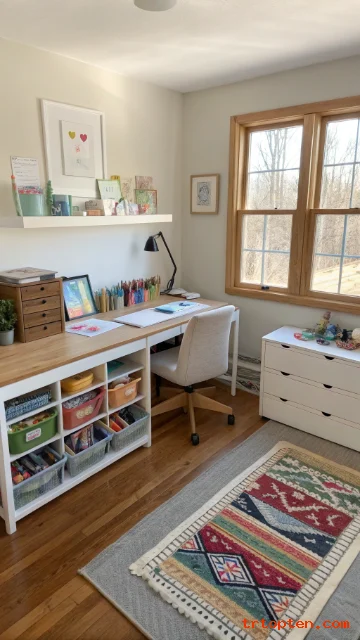
Add Open Cubby Storage
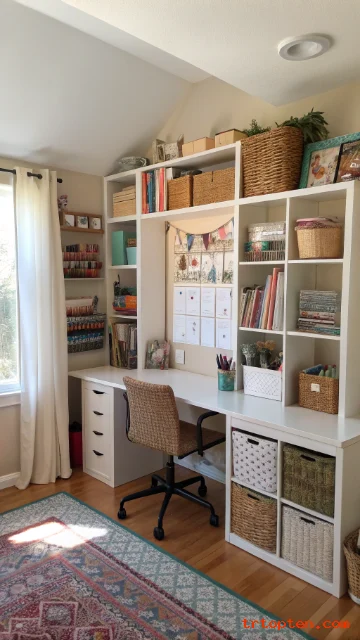
Open cubbies work well for baskets, paper holders, fabric stacks, books, and machines. They give every supply category a clear place.
Use baskets inside the cubbies to hide small items. Leave a few open sections for pretty supplies or decor so the room feels styled.
Place cubby storage along one wall to create a strong organization zone. This layout makes the rest of the room feel cleaner and more open.
Make a Minimalist Craft Office
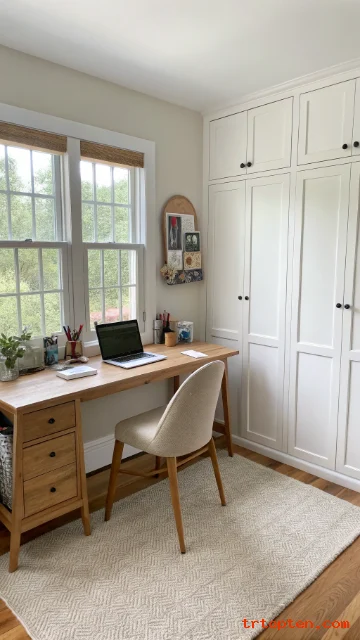
A minimalist craft office keeps only the tools and supplies you use often. This approach works well if clutter makes it hard for you to focus.
Choose closed storage, a simple desk, and a small color palette. White, beige, black, and natural wood can make the room feel calm.
Keep surfaces clear at the end of each day. A minimalist setup supports both focused office work and peaceful creative time.
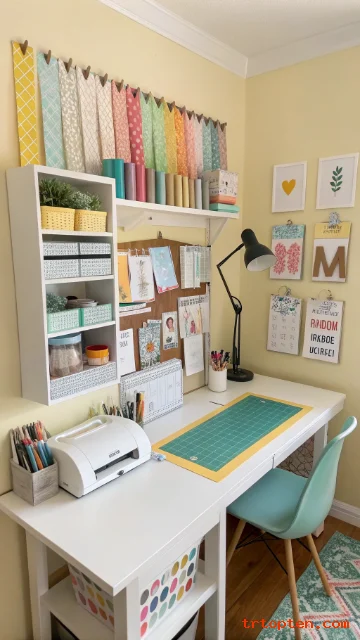
Design a Colorful Creative Studio
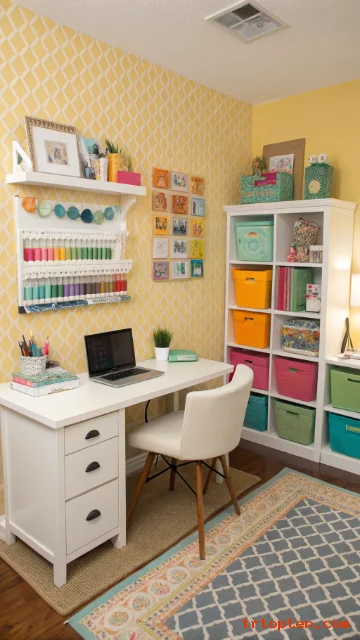
A colorful craft office can boost energy and make the room feel fun. Use bright storage bins, painted shelves, patterned rugs, or colorful wall art.
Keep the main furniture simple so the colors do not overwhelm the room. White desks and wood shelves balance bold craft supplies well.
Choose two or three main colors and repeat them through the space. This makes the room feel playful but still organized.
Use a Room Divider for Shared Spaces
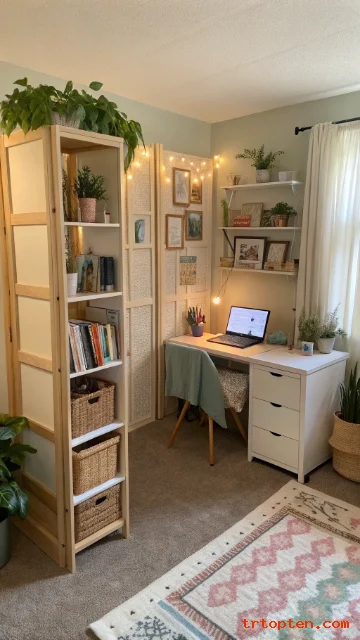
A room divider helps separate your craft office from a bedroom, living room, or guest room. Use a folding screen, open bookcase, curtain, or tall shelving unit.
This idea gives you privacy during work calls and hides craft supplies from the rest of the home. It also creates a clear boundary between work time and personal time.
Choose a divider that adds storage if you need more function. A bookcase divider can hold bins, books, plants, and office supplies.
Add a Gift Wrapping Station
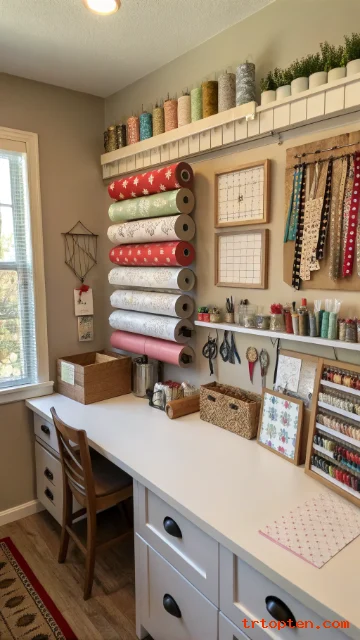
A gift wrapping station makes your craft office useful all year. Store wrapping paper, ribbon, scissors, tags, tape, and tissue paper in one clear zone.
Use wall rods for wrapping paper rolls or place rolls in a tall basket. Keep ribbon on dowels so you can pull and cut it easily.
Add a flat surface for wrapping gifts without bending over the floor. This station also works well for party planning and handmade packaging.
Create a Kids’ Craft and Work Zone
A shared craft office can include a small kids’ craft area without losing adult workspace. Add a child-size table, washable supplies, and low storage bins.
Keep messy items like paint, glue, and glitter in closed containers. Place them higher if young children need supervision.
Use the adult desk for work and the small table for kids’ projects. This layout helps everyone create in the same room while each person has a clear area.
Use Hidden Storage Furniture
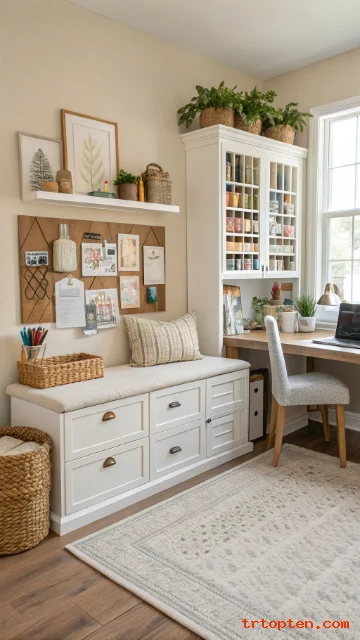
Hidden storage furniture helps a craft office look neat without losing function. Try storage benches, ottomans, file cabinets, lift-top desks, or sideboards.
Place unfinished projects inside hidden storage when guests come over. This keeps the room ready for work, calls, and creative time.
Choose furniture that matches your decor so storage does not feel bulky. A stylish cabinet can hide supplies and still make the room look finished.
Create a Calm Nature-Inspired Craft Office
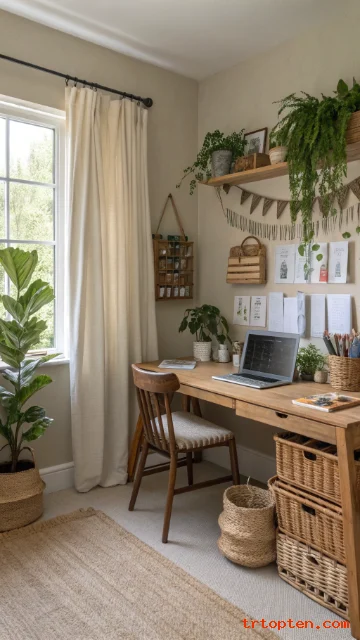
A nature-inspired craft office can make work and creative time feel more peaceful. Use wood furniture, woven baskets, green plants, linen curtains, and soft earth tones.
Place your desk near a window if possible. Natural light supports focus and helps colors look more accurate during craft projects.
Use baskets for storage and plants for warmth. This setup feels fresh, simple, and easy to enjoy every day.
What is the best way to combine a home office and craft room?
The best way is to create clear zones for work and crafting. Use one desk for computer tasks and another surface or cart for creative supplies.
How do I organize a small home office craft room?
Use wall shelves, pegboards, rolling carts, clear bins, and fold-down tables. These storage ideas save floor space and keep supplies easy to reach.
What furniture works best in a craft office?
A wide desk, comfortable chair, storage cabinet, rolling cart, and open shelves work well. Choose furniture that gives you both surface space and hidden storage.
How can I hide craft supplies in a home office?
Use closed cabinets, storage benches, baskets, drawer units, and labeled boxes. Hidden storage keeps the office clean during meetings and video calls.
What lighting does a home office craft room need?
Use natural light, an overhead light, and task lamps. Place task lighting near your desk, sewing machine, cutting mat, or painting area.
How do I make my craft office look less cluttered?
Group supplies by type and store them in matching containers. Keep the desktop clear and move rarely used items to cabinets or higher shelves.
Can I create a craft office in a closet?
Yes, a closet can work well as a compact craft office. Add a desktop, shelves, lighting, bins, and a curtain or doors to hide the space when needed.
What colors work best for a home office craft room?
Soft neutrals create a calm space, while bright colors can make the room feel creative. Choose two or three main colors so the room looks planned.
How much space do I need for a home office craft room?
You can start with a corner, closet, spare wall, or small room. Good storage matters more than the size of the space.
Conclusion
These 25 home office craft room ideas can help you build a space that supports focus, creativity, and daily organization.
A well-planned room gives every tool, paper, fabric, and office item a clear place.