A well-designed walk in closet shelving system turns a messy storage space into a daily delight. You need smart solutions that fit your clothes, shoes, and accessories without wasting an inch.
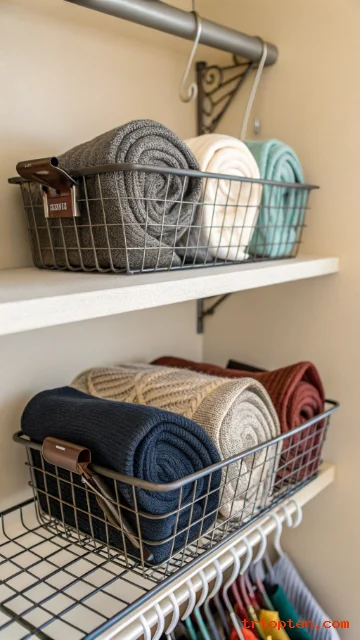
Adjustable Wire Shelving Units
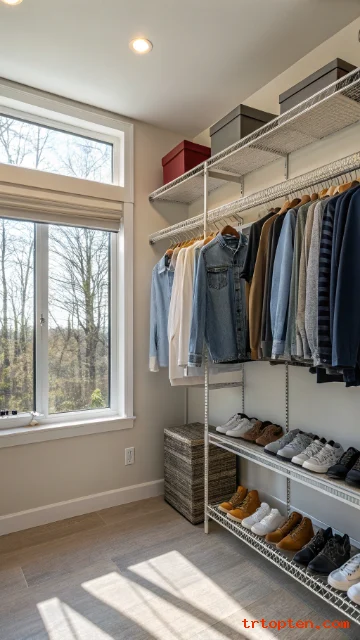
Wire shelving lets you change shelf heights as your wardrobe grows or shrinks. You simply move the brackets up or down without any tools or hassle. This flexibility makes wire systems perfect for evolving closet needs over time.
The open design of wire shelves allows air to circulate freely around your folded clothes. Good airflow prevents musty smells and keeps sweaters fresh between seasons. You can also see everything at a glance because light passes through the wire gaps.
Installation takes an afternoon with basic tools like a level and drill. Most kits include track rails that screw directly into wall studs. Prices start around fifty dollars for a basic starter set from home improvement stores.
Floating Oak Shelves for Minimalist Look
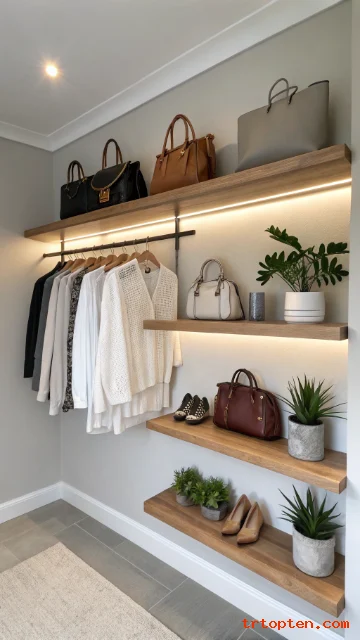
Floating oak shelves create a clean, modern appearance without visible supports or brackets. The hidden mounting system makes the wood appear to hover against your closet wall. This look works beautifully for displaying handbags, hats, or folded cashmere sweaters.
Each solid oak shelf can hold up to fifty pounds when anchored properly into wall studs. You should space them twelve to sixteen inches apart for most folded items. The warm wood tone adds natural texture that prevents the closet from feeling cold or industrial.
Install floating shelves by first attaching a metal rail to the wall. The shelf then slides onto the rail and locks into place securely. You can find ready-to-hang floating oak shelves at IKEA or Etsy for reasonable prices.
Corner Triangle Shelves for Dead Space
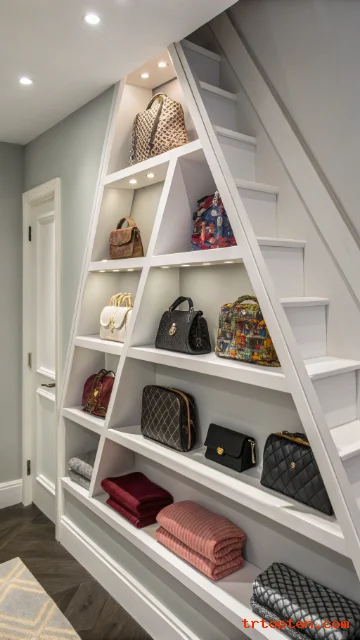
Corner triangle shelves transform wasted ninety-degree angles into valuable storage real estate. These wedge-shaped shelves fit perfectly into closet corners where standard rectangular units won’t go. You can store small items like belts, clutches, or folded scarves in these clever nooks.
Each shelf typically measures sixteen inches along both wall sides with a curved front edge. The design prevents sharp corners that could snag delicate fabrics or hurt your elbow. Many DIYers cut their own corner shelves from plywood using a simple template.
Install corner shelves by screwing a support cleat onto both adjoining walls. Then drop the shelf onto the cleats and secure it from underneath. This method costs under twenty dollars for a weekend project using scrap wood.
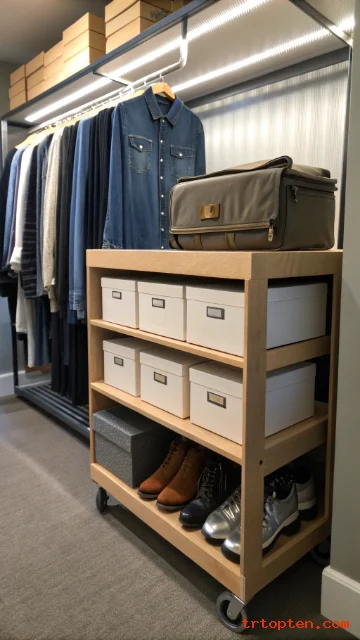
Drawer-Style Pull-Out Shelves
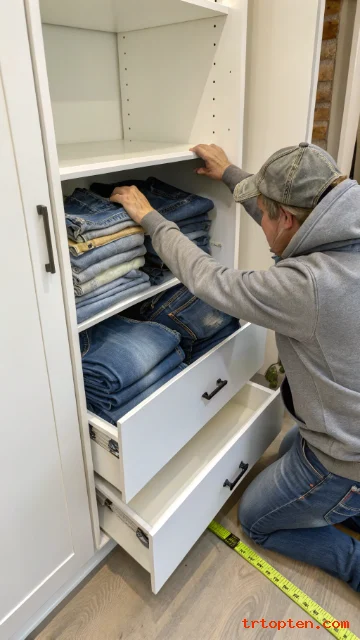
Pull-out shelves work like drawers but without tall sides or front panels. You install sliding hardware underneath a flat shelf that glides forward on smooth ball-bearing tracks. This design gives you full access to items at the back of deep closet cabinets.
Use pull-out shelves for heavy items like stacked jeans, sneaker boxes, or laundry baskets. The full-extension slides let you reach every inch of the shelf surface easily. You can build these yourself using plywood and forty-dollar drawer slide kits.
Installation requires precise measurements to keep the slides parallel and level. Screw the slide rails to the cabinet sides first, then attach the shelf. Test the motion before loading any weight to avoid frustrating adjustments later.
Slanted Magazine-Style Shoe Shelves
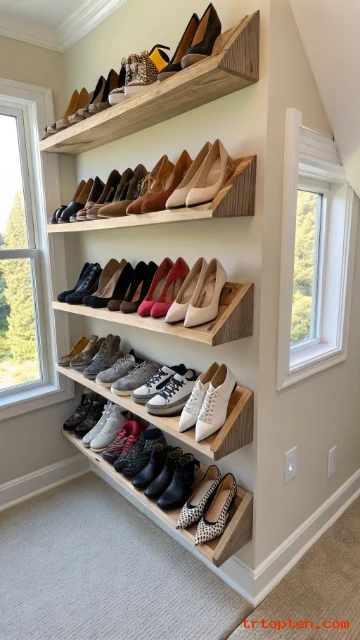
Slanted shelves display shoes like a retail store so you see every pair at a glance. Each shelf tilts downward at a fifteen-degree angle with a small lip at the front edge. This pitch prevents shoes from sliding off while keeping toes visible for quick selection.
Build slanted shelves using one-by-six lumber and a circular saw set to the correct bevel. You need to cut side panels with a matching angle to support the shelf boards. Space each shelf eight inches high for flats or ten inches for heels and boots.
Install these shelves against a single wall or inside a recessed alcove. Paint them white to blend in or leave wood natural for a rustic statement. The angled design actually uses less depth than flat shelves because shoes sit nose-down.
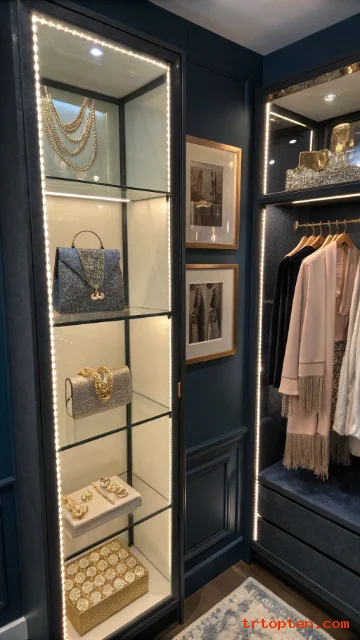
Glass Display Shelves with LED Lighting
Glass shelves add a touch of luxury while keeping your closet feeling open and airy. Tempered glass can hold up to thirty pounds when supported properly every twenty-four inches. The transparent material lets light pass through, illuminating items on lower shelves as well.
Install low-profile LED tape lights underneath each glass shelf for a stunning effect. The cool white light makes crystals, jewelry, and handbags sparkle like a boutique display. You can buy ready-made glass shelf kits with integrated lighting from specialty retailers.
Use glass shelves only for lighter items such as hats, clutches, or decorative boxes. Never store heavy boots or stacked books on glass surfaces to avoid breakage. Clean the shelves with a microfiber cloth and glass spray weekly to maintain clarity.
Rolling Ladder Access for High Shelves
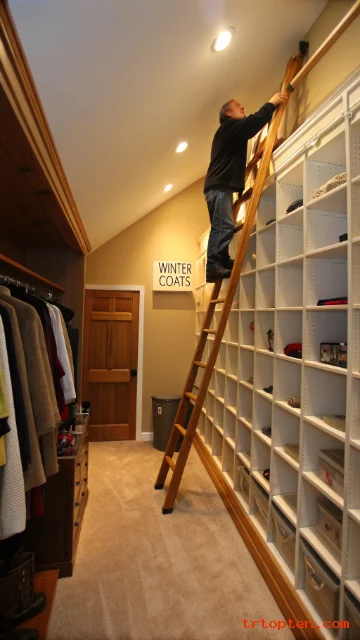
High shelves make use of vertical space but become useless without a safe way to reach them. A rolling ladder on a ceiling-mounted rail glides along your tallest closet wall effortlessly. You simply pull the ladder, climb three or four steps, and access upper storage bins.
Install the rail track securely into ceiling joists using heavy-duty lag bolts. The ladder wheels must lock in place when you step onto the bottom rung. This system costs between two hundred and five hundred dollars depending on wood quality.
Use high shelves for off-season clothing, luggage, or bulky bedding sets. Store items in clear plastic bins with labels facing outward for quick identification. A rolling ladder turns dead upper space into valuable real estate without daily frustration.
Built-In Drying Rack Shelves

Drying rack shelves combine a solid surface with flip-down arms for air-drying delicates. The shelf stays flat for folded clothes most days. When you need to dry hand-washed sweaters, simply flip up the wooden dowels and lay items across them.
This dual-purpose design saves space while protecting cashmere and wool from heat damage. You can buy retrofit drying rack kits that screw onto existing shelves. Or build your own using one-by-three boards and quarter-inch dowels from any hardware store.
Position drying rack shelves near an outlet for a small fan to speed air circulation. Never place them directly above lights or heat sources that could cause shrinkage. The dowel arms fold flat against the wall when not in use, restoring full shelf space.
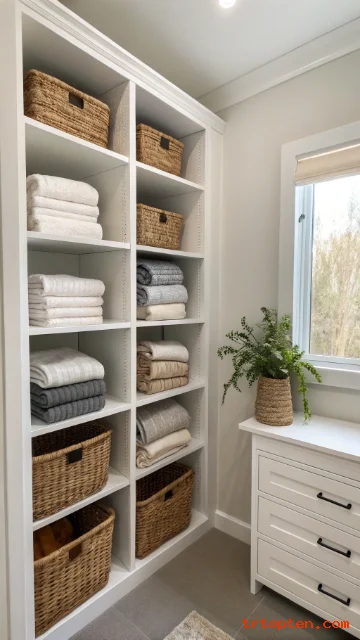
Cube Storage Organizer Shelves
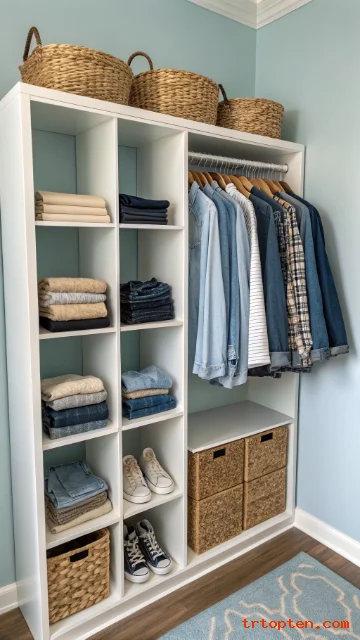
Cube shelves divide your closet into neat, predictable sections for different item types. Each twelve-inch cube holds one category like t-shirts, jeans, or sneakers perfectly. The grid pattern creates a satisfying visual order that makes getting dressed faster.
You can buy prefabricated cube storage units from IKEA, Target, or Walmart for under one hundred dollars. Stack them horizontally or vertically to fit your unique closet dimensions. Add fabric bins to some cubes to hide messy items like workout gear or lingerie.
Install cube units by screwing them into wall studs for stability and safety. Leave the back panel off to access wall space for hooks or rods behind the cubes. Paint the unit the same color as your walls for a built-in custom look.
Cascading Chain Shelf System

Chain shelving hangs from ceiling hooks using decorative chains and wooden boards. You adjust each shelf height by moving chain links up or down on S-hooks. This industrial-chic look works perfectly in loft apartments or modern homes.
Use four chains per shelf for stability, one at each corner. The chain must be rated for at least fifty pounds per shelf to be safe. You can find chain and S-hooks at hardware stores for less than fifteen dollars per shelf.
Install ceiling hooks directly into joists or use toggle bolts for drywall. Cut plywood or pine boards to your desired shelf length and drill holes for the chains. This system lets you reconfigure shelf heights in minutes without tools.
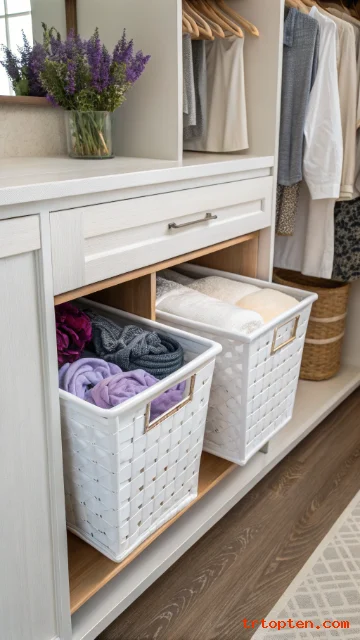
Under-Shelf Hanging Baskets
Under-shelf baskets slide onto the bottom of any shelf to double your storage capacity. These wire baskets hang down about four inches and hold small, lightweight items. You can store belts, scarves, gloves, or rolled ties without taking up shelf surface space.
The baskets attach with simple clips that grip the shelf edge firmly. Most models hold up to ten pounds and come in widths from twelve to twenty-four inches. Purchase them online or at container stores for ten to twenty dollars each.
Install them by clipping the basket hooks over your existing shelf front. Make sure the basket does not block items stored directly below it on lower shelves. Use multiple baskets side by side for a continuous row of handy under-shelf storage.
L-Shaped Wraparound Shelving
L-shaped shelving follows two adjoining walls to maximize corner closet space completely. One long shelf run connects to a perpendicular run without any gap or dead zone. This design creates a continuous storage surface that feels custom-built for your room.
Measure both wall lengths carefully before cutting your shelf boards. Use a miter joint at the corner where the two shelves meet for a seamless look. Secure both shelf runs to wall studs using heavy-duty L-brackets every sixteen inches.
Paint the L-shaped shelves the same color as your walls to make them visually disappear. This trick makes a small closet feel larger because the storage blends into the architecture. Use the long leg for folded clothes and the short leg for shoe boxes.
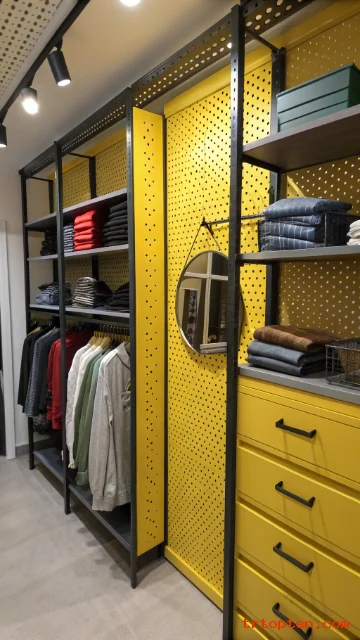
Pegboard Backed Shelving
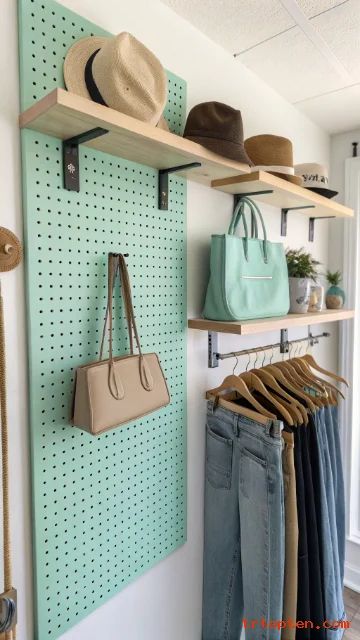
Pegboard shelves combine traditional shelving with a perforated back panel for hanging tools. You screw the pegboard to the wall first, then install shelves using pegboard brackets. The empty wall space between shelves holds hooks for bags, hats, or jewelry organizers.
This system costs under fifty dollars for a four-by-eight-foot sheet of pegboard and accessories. Paint the pegboard a bright color like coral or mint to add personality. The holes allow you to rearrange hooks weekly without damaging your walls.
Install pegboard over furring strips to create a half-inch air gap behind it. This gap lets pegboard hooks insert fully and lock into place securely. Use standard shelf brackets that peg into the holes for adjustable shelf heights.
Sliding Barn Door Shelves
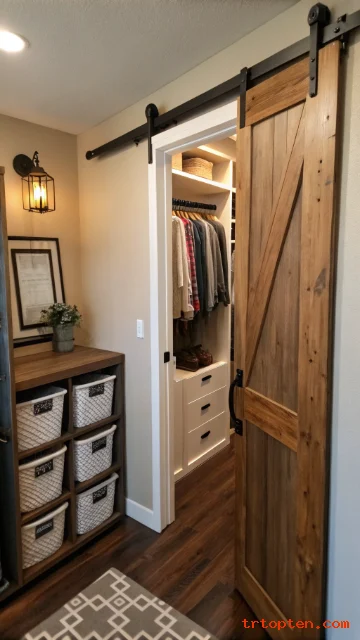
Barn door shelves mount on a track system to slide horizontally and reveal hidden storage behind them. The shelf itself moves left or right on rollers, not the door. This clever design lets you double your storage depth in narrow closets.
Build a shallow shelf unit on a sliding rail that covers a deeper recess behind it. Slide the shelf to the left to access deep bins on the right side. This system works perfectly for linen closets where you need both folded sheets and tall vacuums.
Install heavy-duty drawer slides rated for at least one hundred pounds. The shelf must roll smoothly without binding on any obstacles. Expect to spend eighty to one hundred fifty dollars on quality sliding hardware.
Tilt-Out Laundry Hamper Shelves
Tilt-out shelves hide dirty laundry inside a cabinet while providing a flat surface on top. The front panel hinges at the bottom and tilts forward to reveal a hamper inside. You toss clothes into the bin without seeing any mess from the outside.
Build a standard shelf cabinet but install a hinged front on one or more compartments. Attach a removable fabric or plastic hamper inside each tilting compartment. The top surface holds folded towels or toiletries like a normal shelf.
Use this design in master closets to separate lights, darks, and delicates. Each tilt-out bin should have a handle or finger pull for easy opening. The mechanism is simple and requires only basic hinges and wood screws.
Repurposed Ladder Shelves
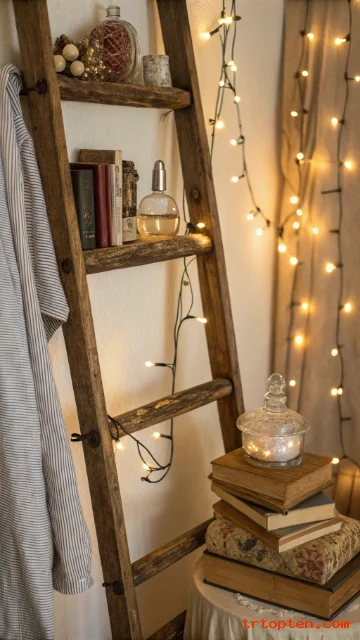
An old wooden ladder becomes a unique leaning shelf unit for a bohemian closet. You simply hang the ladder horizontally on wall brackets or let it lean vertically. The rungs act as individual shelves for small items like perfume bottles or jewelry boxes.
Find an antique wooden ladder at flea markets or salvage yards for under forty dollars. Sand it lightly and apply clear varnish to preserve the weathered character. Attach small L-brackets under each rung if you plan to store heavy items.
Secure the ladder to the wall with screws through the side rails. A leaning ladder needs a rubber stopper on the floor to prevent slipping. Paint the ladder a bold color like navy or emerald for a modern twist.
Floor-to-Ceiling Column Shelves
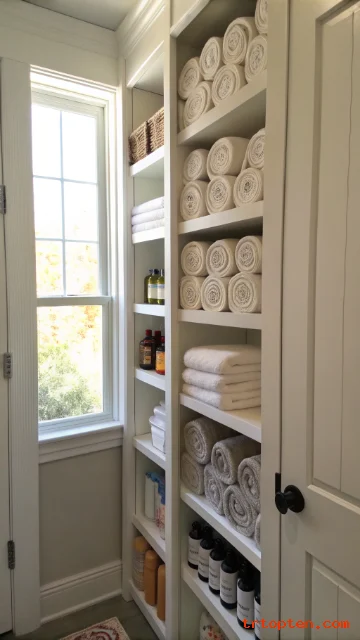
Column shelves are narrow vertical units that fit into slim gaps between doors or windows. Each column measures just twelve inches wide but runs from floor to ceiling. This skinny tower holds rolled towels, shoe shine kits, or folded pajama sets beautifully.
Build column shelves using one-by-twelve boards cut to your ceiling height. Install fixed shelves every ten inches for a consistent rhythm. The narrow width means you can tuck these units into almost any forgotten space.
Anchor the column securely at the top and bottom to prevent tipping. Use a French cleat system for a floating appearance that hides all hardware. Paint the column the same color as the adjacent wall to make it disappear visually.
Retractable Ironing Board Shelf
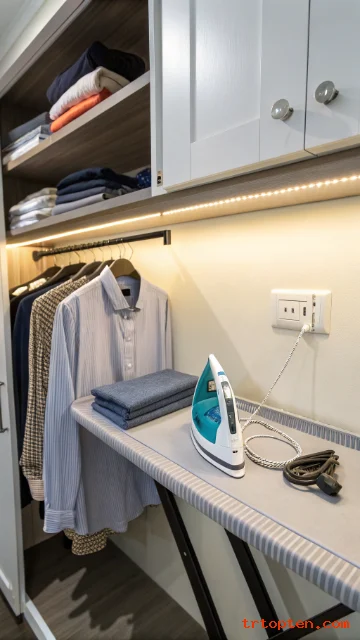
A retractable ironing board hides inside a shelf and pulls out when you need it. The shelf front swings down to become the ironing surface while the shelf top stays put. This genius design saves you from storing a bulky ironing board elsewhere.
Purchase a ready-made retractable ironing board kit for seventy to one hundred fifty dollars. The kit includes the board, hinges, and a metal frame that mounts to shelf cleats. You install it into a standard twelve-inch deep shelf cavity.
The ironing board folds flat against the shelf bottom when not in use. A magnetic latch keeps it closed so it doesn’t swing open accidentally. Install this shelf near an outlet for your iron’s cord to reach easily.
Cubbie with Charging Station Shelf
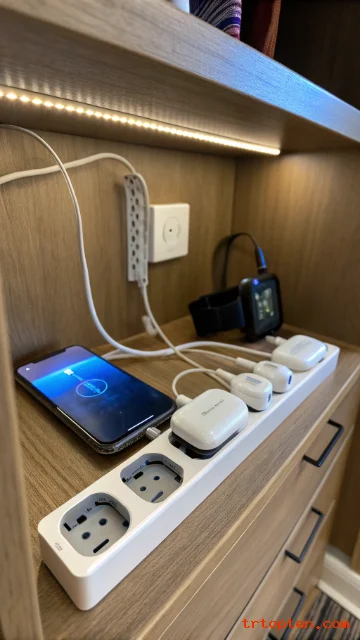
A charging station shelf has a hidden power strip and cord management holes. You drill small ports into the shelf back to thread phone and watch cables through. This keeps devices off the floor while they charge overnight in your closet.
Install a power strip inside a cubby or on the wall behind the shelf. Use adhesive cord clips to route cables neatly to each device. This setup costs under thirty dollars if you already own a power strip.
Cut cord holes using a one-inch spade bit and sand the edges smooth. Label each cable with a small tag so you know which belongs to which device. Charge your smartwatch, e-reader, and phone without messy dangling wires.
Live Edge Wood Slab Shelves
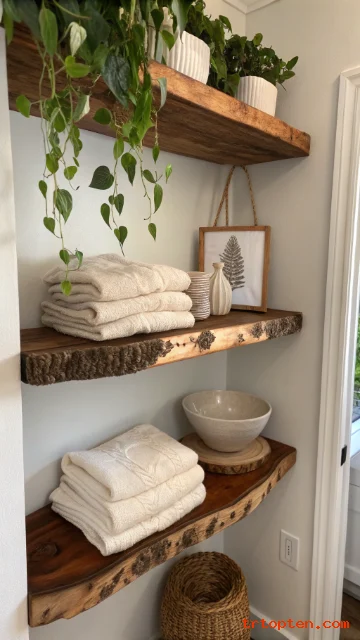
Live edge shelves retain the natural curve of the tree trunk along one side. This organic shape adds warmth and artistry to an otherwise plain closet. The rough bark edge contrasts beautifully with folded clothes and soft linens.
Buy live edge slabs from local sawmills or online specialty retailers. A twelve-inch by forty-eight-inch slab costs between sixty and one hundred fifty dollars. Seal the wood with clear epoxy or matte polyurethane to prevent warping.
Mount live edge shelves using hidden floating shelf hardware for a clean look. Position the natural edge facing outward to show off the wood’s character. Pair with simple metal brackets if floating hardware seems too complex.
Perforated Metal Shelf Backs
Perforated metal sheets replace solid wood backs on open shelving units. The tiny holes let you insert hooks anywhere on the back panel without drilling. This creates a hybrid shelf system where the back acts like a pegboard.
Buy a four-by-two-foot perforated metal sheet from a hardware store for twenty dollars. Screw it to the wall first, then install your standard shelves in front of it. The shelves stick out about ten inches, leaving the metal back exposed for hanging.
Use magnetic hooks on the metal back for even more flexibility. Hang small items like scissors, lint rollers, or measuring tapes within arm’s reach. Paint the metal sheet a fun color to make it a design feature, not just storage.
Wall-Niche Shelves Between Studs
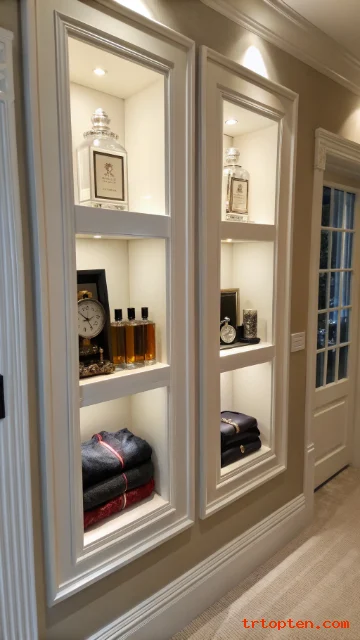
Wall-niche shelves fit inside the empty space between two wall studs. You cut a rectangular hole in the drywall and build shelves inside the cavity. This recessed storage adds zero floor footprint while using dead wall space.
Each stud bay measures about fourteen and a half inches wide and three and a half inches deep. That depth works perfectly for small bottles, folded t-shirts, or jewelry boxes. You can create multiple niches at different heights along one wall.
Installation requires cutting drywall, building a plywood box, and adding shelves. Finish the edges with trim for a polished built-in appearance. Paint the inside of the niche a darker color to make items pop visually.
Rolling Cart Shelf Inserts
A rolling cart on casters slides under a standard shelf like a mobile drawer. You build a low platform with wheels that fits into the shelf’s footprint. Pull the cart out fully to access items at the very back of deep shelving.
Use this system for heavy items like boot boxes or out-of-season shoe storage. The cart should have a lip or railing to prevent things from rolling off. Four locking casters keep the cart steady when you don’t want it to move.
Build the cart from three-quarter-inch plywood with heavy-duty three-inch wheels. Make it one inch narrower than the shelf width for smooth sliding. Paint it to match your closet so it disappears when pushed back in.
Hanging Garment Bag Shelf
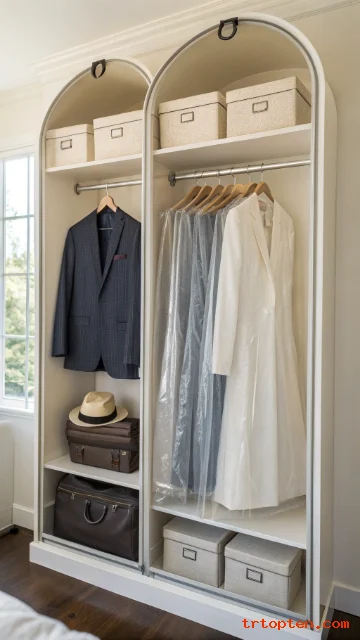
A dedicated shelf for hanging garment bags keeps formal wear wrinkle-free and dust-free. This shelf is just a standard board with a sturdy rod mounted underneath it. You hang the garment bags on the rod and store shoes or hats on top.
Position this shelf near your closet entrance for easy access to suits and gowns. The rod should sit at least sixty inches from the floor for floor-length bags. Use heavy-duty rod brackets that can hold twenty pounds or more.
The shelf top can hold hat boxes or folded scarves without interfering with the hanging bags below. Paint the shelf and rod the same color for a cohesive look. This simple addition costs under thirty dollars and takes an hour to install.
Spice Rack Style Narrow Shelves
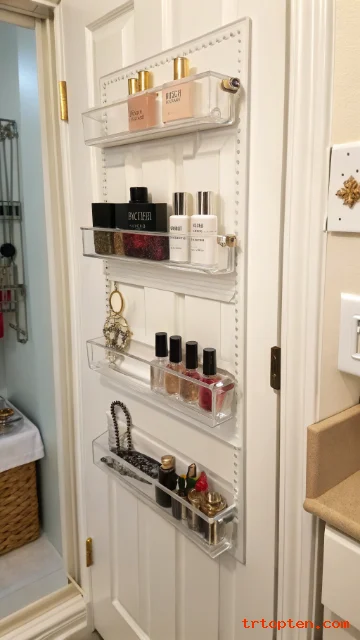
Tiny shelves sized like spice racks attach to the inside of closet doors. Each shelf measures just three inches deep and twelve inches wide. This shallow depth is perfect for nail polish, perfume samples, or small jewelry trays.
Mount these mini shelves on the back of your closet door using heavy-duty adhesive strips. You can buy ready-made spice racks for five to fifteen dollars each. Arrange them in a staggered pattern for visual interest and easier access.
Use clear acrylic shelves to make the items appear to float on the door. Label each shelf category like “perfume” or “sunscreen” for quick grabbing. The door still closes fully because the shelves add only three inches of depth.
Scaffold Board Industrial Shelves
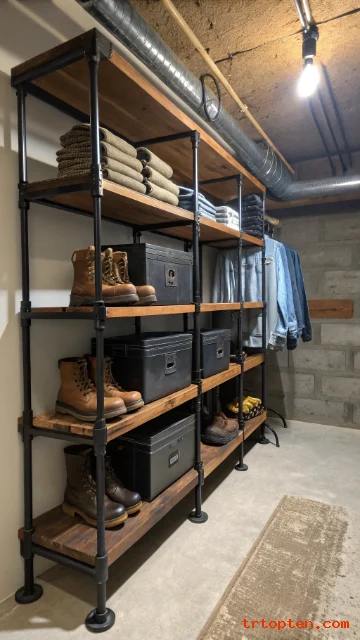
Scaffold boards are thick, heavy planks originally used for construction platforms. Each board measures two inches thick and nine inches wide for serious durability. These rugged shelves hold extremely heavy items like boot collections or stacks of denim.
Buy used scaffold boards from construction supply companies for ten to twenty dollars each. Sand them lightly to remove splinters but leave the paint drips and stamps for character. Support them with heavy-duty pipe brackets made from black iron gas pipe.
Install the pipe brackets into wall studs using three-inch lag bolts. Space the brackets every twenty-four inches for boards longer than four feet. The industrial look pairs perfectly with concrete floors or exposed brick walls.
Magnetic Knife Strip Shelves
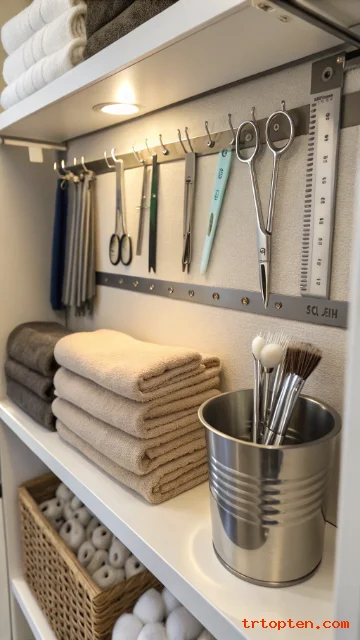
Magnetic knife strips hold metal items vertically on your closet wall. These strong magnets attach to the strip and grip bobby pins, tweezers, or nail clippers. You free up shelf space by moving small metal items to the wall.
Buy a sixteen-inch magnetic knife strip for ten dollars from any kitchen store. Screw it into a wall stud or drywall anchor near your grooming station. The strip holds items firmly but lets you slide them off easily when needed.
Use multiple strips in a row to create a full wall of magnetic storage. Attach small metal cups to the strip to hold cotton balls or hair ties. This works best for items you use daily so they stay within easy reach.
What is the best depth for walk in closet shelving?
Most walk in closet shelves work best at twelve to sixteen inches deep. This depth fits folded clothes, shoeboxes, and handbags without wasted space. Deeper shelves make items get lost in the back.
How much weight can closet shelves hold?
Standard wire shelves hold thirty to fifty pounds per shelf. Solid wood shelves anchored into studs can hold one hundred pounds or more. Always check your shelf bracket weight ratings before loading heavy items.
Should I use fixed or adjustable shelving in my closet?
Adjustable shelving offers more flexibility as your storage needs change over time. Fixed shelves look more built-in and custom but lock you into one configuration. Start with adjustable systems if you are unsure about your long-term needs.
What is the best material for closet shelves?
Solid wood looks beautiful and lasts for decades with proper care. Melamine-coated particle board resists scratches and costs less than wood. Wire shelving provides airflow and adjustability at the lowest price point.
Can I install closet shelving myself without professional help?
Yes, most closet shelving systems come with clear instructions for DIY installation. You need basic tools like a drill, level, stud finder, and tape measure. Watch online video tutorials for your specific shelf type before starting.
How high should I space my closet shelves?
Space shelves ten to twelve inches apart for folded t-shirts and sweaters. Leave fourteen to sixteen inches for stacked jeans or shoeboxes. Taller items like boots or bags need eighteen to twenty inches between shelves.
What is the cheapest way to add shelves to a walk in closet?
Buy ready-made wire shelf kits from home improvement stores for under one hundred dollars. Use basic L-brackets and pine boards from a lumber yard for an even cheaper option. Repurpose existing furniture like bookcases before buying new materials.
Do I need to anchor shelves into wall studs?
Yes, always anchor heavy shelves into wall studs for safety and stability. Use drywall anchors only for very lightweight shelves holding less than ten pounds. A loaded shelf falling off the wall can cause serious injury.
How do I organize items on my new walk in closet shelves?
Group similar items together like all sweaters on one shelf and all bags on another. Store frequently used items at eye level and seasonal items on higher shelves. Use clear bins or labels to identify contents quickly.
Can I add shelves to a walk in closet with slanted ceilings?
Yes, custom-cut shelves can fit perfectly under slanted ceilings for extra storage. Use shorter shelves on the low side and taller shelves as the ceiling rises. Measure the ceiling height at multiple points before cutting any wood.
Conclusion
These 27 walk in closet shelving ideas prove that smart storage transforms a messy space into an organized haven.
You can choose from budget-friendly wire systems, elegant floating oak designs, or space-saving corner solutions depending on your needs.