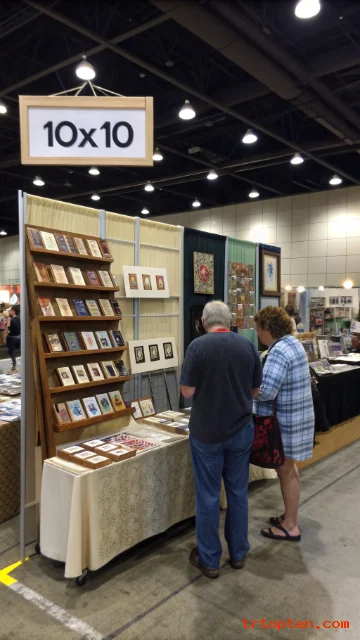
Struggling with your 10×10 craft booth layout? You need fresh 10×10 craft booth layout ideas to stand out at shows. This guide shares 25 proven setups for serious makers.
The Diagonal Flow Layout
Place your main table diagonally from the front left corner to the back right corner. This angle naturally pulls shoppers inside your booth. Two small side tables on the open sides create a welcoming entry point.
Add a standing sign at the diagonal’s midpoint to catch attention. Your best-selling items should sit right at that center point. Customers will walk a curved path and see almost every product.
Use black pipe shelving on the back wall for vertical storage. Keep the floor clear of boxes or clutter. A simple dark rug under the diagonal table anchors the whole design.
The U-Shape Encounter
Set three tables in a U shape with the opening facing the aisle. This design traps foot traffic inside your booth for longer visits. Place your tallest displays at the U’s closed end.
Hang grid panels on the inner sides of the U for smaller goods. Keep the middle floor space empty so customers can turn around easily. Use clip-on lights to brighten each corner of the U.
The cash wrap belongs at one leg of the U near the exit. Train your staff to stand inside the U’s open area. This layout works best for jewelry, soap, or small home decor items.
The Living Room Setup

Arrange furniture like a cozy living room with a central coffee table. Use a small sofa or two armchairs to create seating. This invites shoppers to rest and look at larger items like quilts or pottery.
Place a tall bookcase behind the seating for display. Add a floor lamp in one corner for warm ambiance. A woven rug ties all the pieces together.
Keep pathways at least 36 inches wide for wheelchair access. Rotate items from the bookcase to the coffee table hourly. This booth style builds emotional connections with slow shoppers.
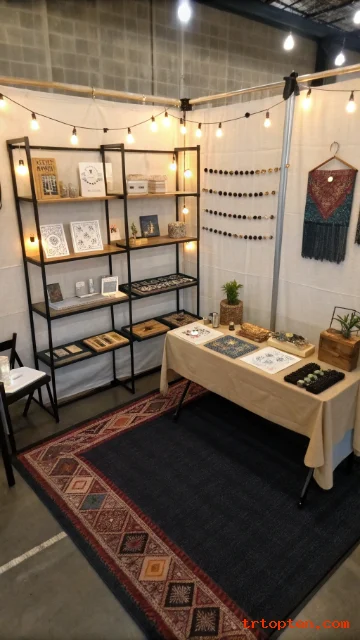
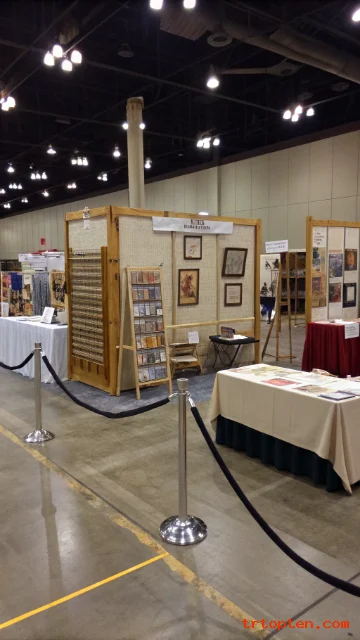
The Towering Back Wall
Build a single massive shelving unit across your entire back wall. Use 6-foot tall shelves with 12-inch depth for maximum visibility. Paint the unit white to recede visually and make products pop.
Place three folding tables in front of the shelves in a staggered row. Keep the front table low at 28 inches for small impulse buys. The middle table holds medium items, and the back wall holds large statement pieces.
Add battery-powered strip lights under each shelf. This hierarchy of heights guides eyes from floor to ceiling. You can pack 200+ items into this dense but organized layout.
The Double Island

Place two 8-foot tables parallel to each other in the center of your booth. Leave a 3-foot aisle between them for shoppers to walk through. This creates a browsing tunnel effect.
Hang a lightweight canopy from the ceiling grid between the tables. Use that canopy to display hanging items like wind chimes or dreamcatchers. Place your tallest items at the far ends of both tables.
Stand at one end of the tunnel to greet everyone who enters. Keep a small side table near you for quick checkout. This layout doubles your visible inventory without feeling crowded.
The Corner Showstopper
Push all tables to the back right corner of your 10×10 space. Angle a single tall display rack at the corner’s edge. This leaves a large open area at the front left for demos or crowds.
Set up a small workbench in the open area for live crafting. Customers love watching you make items on the spot. Keep a rope stanchion to manage lines during busy hours.
Use two rolling racks along the back left wall for hanging goods. The corner’s depth creates a natural stage for your best products. Position a bright spotlight on that corner display.
The Hanging Gallery
Skip floor tables entirely and hang everything from grid walls. Use 4-foot by 6-foot grid panels on all three back walls. Attach S-hooks, baskets, and wire shelves to the grids.
Suspend a second level of grids from the ceiling for lightweight scarves or prints. This creates a two-story hanging effect that draws eyes upward. Place a single small pedestal table in the center for your credit card reader.
Keep a step stool nearby for reaching high items. Use strong zip ties to secure every panel to your tent frame. This layout frees up floor space for up to 15 customers at once.
The Spoke And Wheel
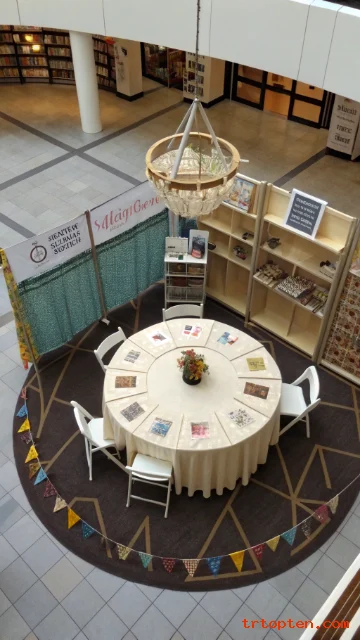
Place a round table in the exact center of your booth. Run four narrow shelves outward like spokes from that center. Each spoke holds a different product category.
Customers walk around the wheel to see every spoke. Use a rotating lazy Susan on the center table for premium items. Keep the outer ends of spokes low at 24 inches for children to see.
Hang a circular sign above the wheel reading “Start Here.” Position yourself at one spoke’s end to direct traffic. This layout fits perfectly in a 10×10 corner booth spot.
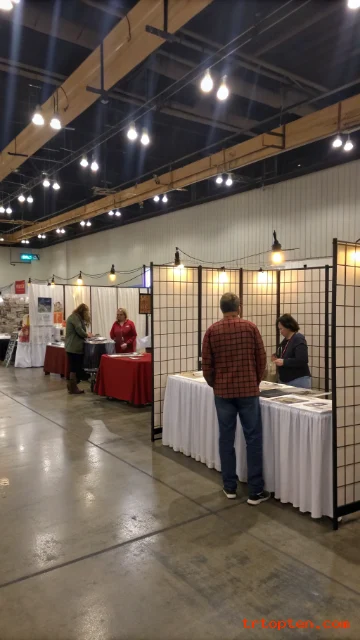
The Backward Booth
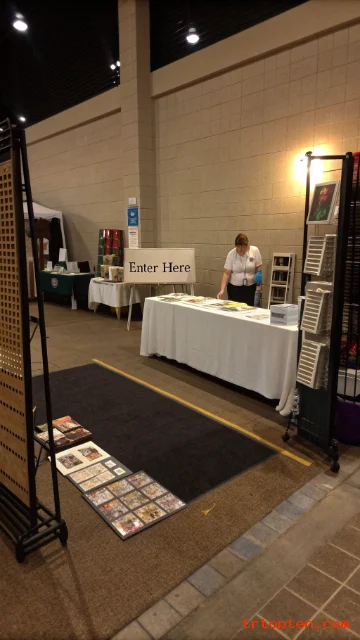
Face your tables toward the back wall instead of the aisle. Customers must enter fully to see your products. This eliminates drive-by glances and increases serious browsing.
Set up a welcome mat at the front edge of your tent. Place a small “Enter Here” sign on a stand. Use tall rolling racks to block the sides so people cannot peek in.
Stand with your back to the real back wall and greet everyone who steps onto the mat. This layout feels exclusive and mysterious. You will get fewer but more qualified shoppers.
The Modular Cube
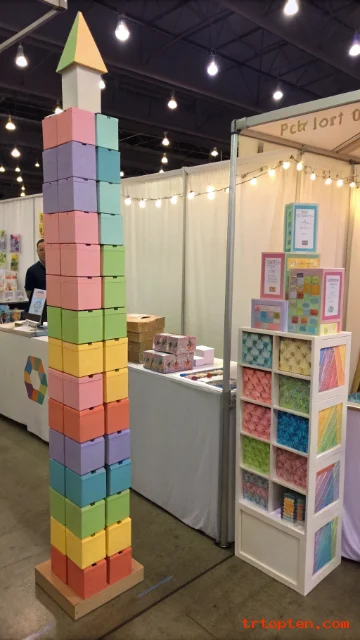
Build six 2-foot cube shelves that stack in different configurations. Stack three cubes as a tower on the left side. Stack two cubes as a shorter tower on the right.
Place one cube sideways as a checkout counter near the front. The cubes can rearrange for each show’s unique traffic flow. Paint each cube a different pastel color for playful branding.
Fill cubes with one product type per opening. Customers love the puzzle-like layout. This system packs flat in your car and sets up in 15 minutes.
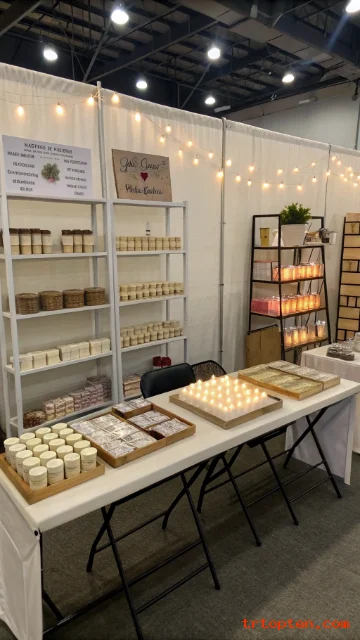
The Low Rider
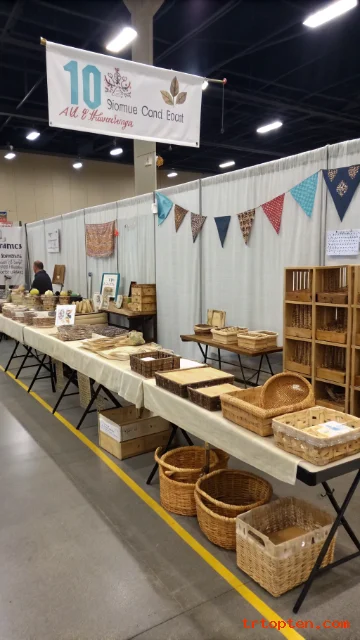
Keep all displays under 36 inches tall. Use short trestle tables and floor baskets. This opens sightlines across the entire booth from the aisle.
Hang a large banner at 7 feet high to draw attention overhead. The contrast between low products and a high sign creates curiosity. Use wide shallow trays instead of deep bins.
Crawl spaces under tables become extra storage. This layout works best for flat items like prints, cards, or fabrics. Tall booths next to you will not block your view.
The Spiral Path
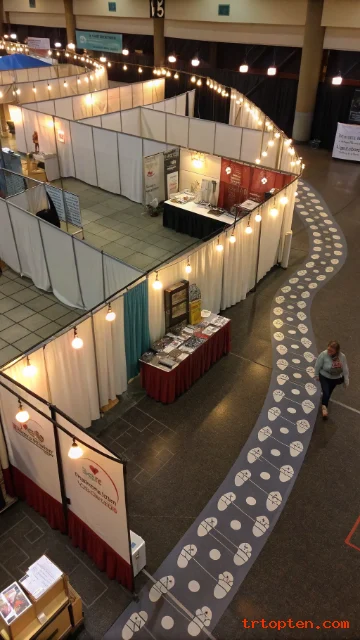
Create a winding path using movable fabric screens. Start the path at the front right and end at the back left. Customers must walk a full S-curve to exit.
Place your cheapest items at the path’s start. Put your highest margin products at the path’s midpoint. Put clearance bins at the very end near the cash wrap.
Use floor stickers shaped like footprints to guide the way. This layout controls traffic flow completely. You can adjust the spiral width based on crowd size.
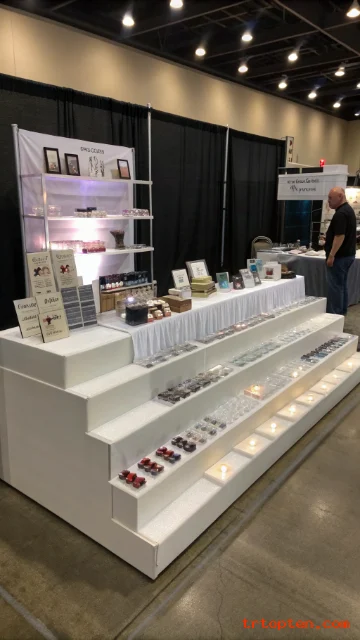
The Tiered Wedding Cake
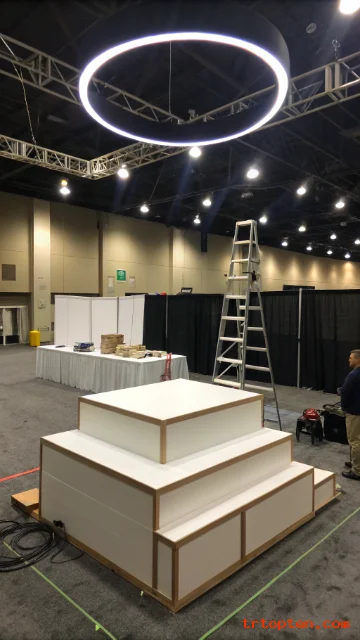
Build three concentric rectangular tables rising in height. The outer ring is 28 inches tall and holds small impulse items. The middle ring is 36 inches tall for medium products.
The center ring is 48 inches tall for your hero products. Each ring has a 1-foot wide surface. Customers lean over the lower rings to see the higher ones.
Use a small ladder to restock the top ring during slow periods. This layout displays 50+ items in a 4-foot by 4-foot footprint. The rest of your 10×10 space becomes a waiting area.
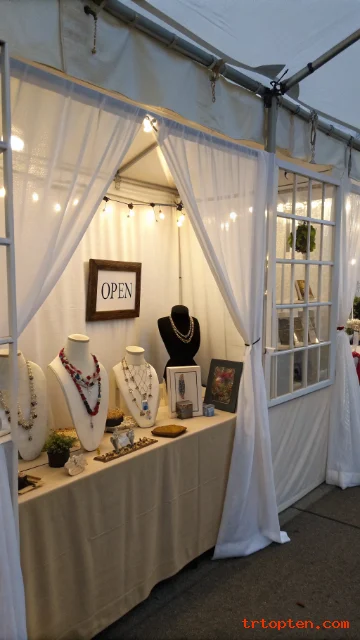
The Window Display
Frame your booth like a store window on three sides. Use PVC pipes to create false window frames. Stretch white fabric inside each frame as a fake glass background.
Place mannequins or bust forms wearing your crafts. Hang tiny curtains on the frames for a homey feel. Write “Open” on a small sandwich board near the entrance.
Stand outside your own booth to check the framed views. Shoppers will stop to photograph your windows. This layout works perfectly for wearables and accessories.
The Bistro Café
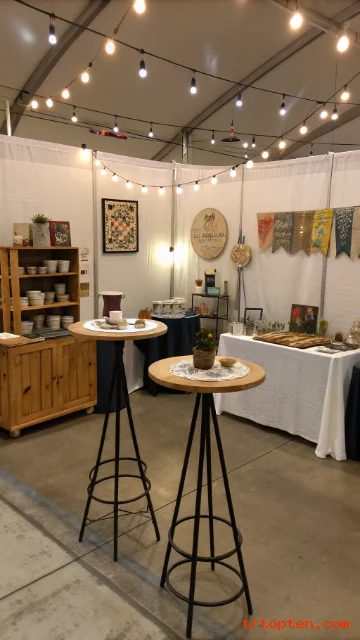
Set two small high-top bistro tables near the front. Cover each table with a small product display. This mimics a café and feels unintimidating.
Place your main inventory on a sideboard against the back wall. Use a bar cart as a rolling display for drinks or small goods. Hang string lights across the ceiling for a evening market vibe.
Shoppers can lean on the bistro tables while examining items. This layout encourages group browsing. Keep a water pitcher on the bar cart for thirsty customers.
The Horseshoe Plus
Extend the U-shape by adding a small island in the center. The center island holds your daily deal or sale bin. Customers walk around the island while inside the horseshoe.
Make the island only 2 feet by 2 feet to keep pathways clear. Use a bright colored tablecloth on the island for contrast. Place a spinning rack of small items on the island.
The horseshoe walls hold large expensive pieces. The island holds cheap add-on sales. This layout increases average transaction value by 30 percent.
The Racetrack
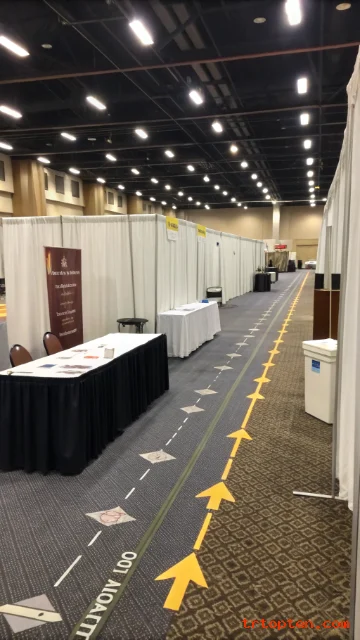
Run two long tables parallel to the side walls. Leave a 4-foot wide aisle down the middle. Place a smaller third table at the far back wall.
Customers enter at front, walk straight to the back, loop around the back table, and exit along the opposite side. This creates a one-way racetrack flow. No one ever needs to turn around or squeeze past others.
Place your checkout at the exit point near the front corner. Use floor arrows made of tape to show direction. This layout handles high-traffic shows with ease.
The Black Box
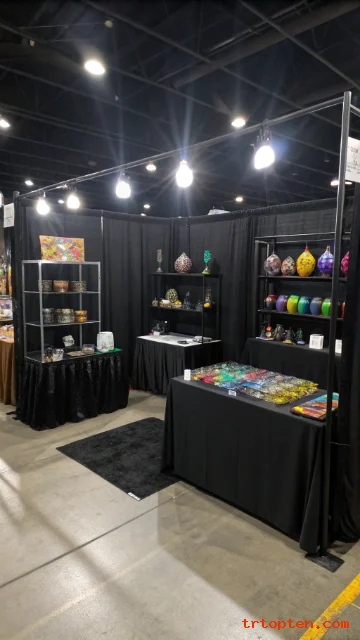
Paint or drape everything in black fabric. Use black tables, black shelves, and a black floor mat. Your colorful products will pop like stars in a night sky.
Install bright white spotlights aimed directly at each product cluster. Hide all packaging and supplies under black skirts. Keep your clothing and signage black as well.
This layout tricks the eye into seeing more space. The dark background hides visual clutter instantly. Shoppers remember your booth as the dramatic one.
The Step And Repeat
Build a three-level stepped platform across your back wall. Each step is 1 foot high and 1 foot deep. The lowest step is at floor level, the middle at 1 foot, the top at 2 feet.
Place products on each step by size: smallest on top, largest on floor. Use clear acrylic risers on the steps for even more height. Customers see every product without crouching.
Stand at the side of the steps to help shoppers reach top items. This layout uses vertical space efficiently. You can fit 80 items in a 8-foot wide stepped display.
The Privacy Curtain
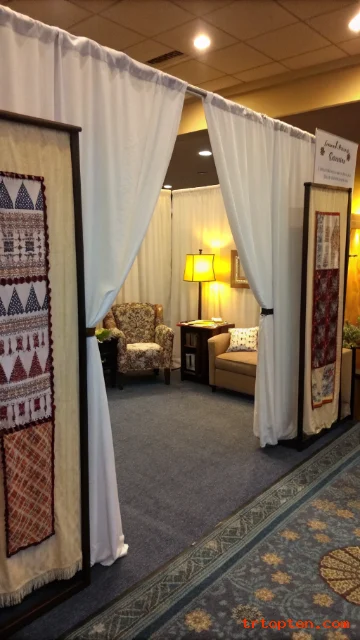
Hang thick curtains along the front of your booth. Leave a single 3-foot opening in the center. This blocks outside distractions and creates a calm shopping room.
Place soft carpet on the floor and play quiet music. Use warm yellow lamps instead of harsh white lights. Add a small loveseat for seating inside.
Only serious shoppers will step past the curtain. Once inside, they stay longer and buy more. This layout reduces casual lookers by half but doubles sales per visitor.
The Ladder Rack
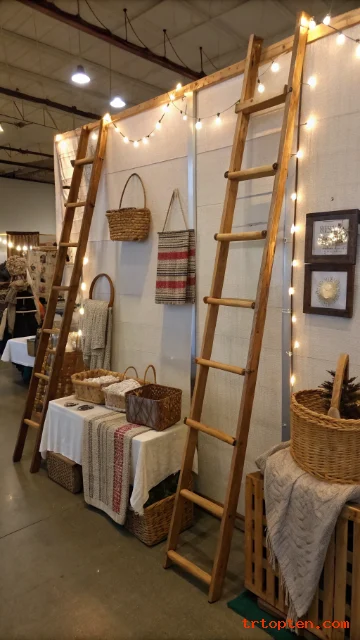
Lean six wooden ladders against your back wall at different angles. Each ladder becomes a display rack for blankets, towels, or clothing. Space the ladders 1 foot apart for easy access.
Hang baskets from ladder rungs for small items. Place a small table at the base of each ladder for folded goods. Use the tallest ladder in the center as a focal point.
Wrap fairy lights around each ladder for a rustic glow. This layout costs under $100 for all ladders. It breaks down flat and fits in any car.
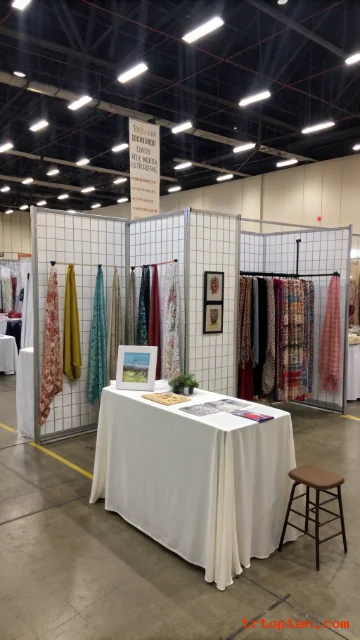
The Grid Lock

Cover every wall surface with 2-inch grid wire. Use the floor as a grid too with rubber mat tiles. This creates a uniform modular system for any product.
Attach products directly to wall grids using clips and mini shelves. Lay products directly on floor grids for a cohesive look. Use grid panels as table risers by bending them.
Customers perceive the repetition as clean and modern. You can rearrange the entire booth in 10 minutes. This layout appeals to industrial and minimalist brands.
The Asymmetric Burst
Place your largest display 2 feet from the front left corner. Place your second largest display 3 feet from the back right corner. Leave everything else intentionally uneven.
Use different heights, colors, and shapes for every element. No two shelves share the same dimensions. This chaos attracts attention because it breaks expected patterns.
Keep your price signs uniform and clear to balance the chaos. Customers will stop to figure out your layout. That pause often leads to a purchase.
The Portable Village
Use three small pop-up kiosks inside your single 10×10 space. Each kiosk is a 3×3 foot mini booth on wheels. Roll them apart to create aisles or together for a single unit.
Paint each kiosk a different brand color. One kiosk holds jewelry, one holds candles, one holds soaps. Lock the wheels during show hours for stability.
This layout lets you test which product gets the most traffic. Move the best-selling kiosk closer to the aisle. You can also rent one kiosk to a friend for shared booth cost.
The Negative Space
Leave 40 percent of your booth completely empty. Use only one wall for display. Place a single bench in the empty area.
This radical minimalism whispers confidence. Shoppers will approach because your booth looks uncluttered. They will ask why you have so much empty space.
Answer that you only display your best work. The empty space becomes a luxury signal. This layout works only for high-end crafts above $100.
What is the best 10×10 craft booth layout for first-time vendors?
The U-shape layout works best for beginners because it keeps everything visible. You can stand inside the U and reach all your products easily. This layout also hides storage boxes under the side tables.
How many products can fit in a 10×10 craft booth?
Most vendors display between 50 and 200 items depending on product size. Jewelry sellers fit over 500 pieces using grid walls and tiered displays. Furniture makers might only fit 10 large pieces.
Should I put a table in the middle of my 10×10 booth?
Only place a center table if you leave 3-foot walkways around all sides. A center table without clearance creates bottlenecks and frustrated customers. Use a small 2-foot round table instead of a large rectangle.
What colors make a 10×10 craft booth look bigger?
White, light gray, and beige recede visually and expand perceived space. Black or dark blue walls shrink the booth dramatically. Use white tablecloths and white grid panels for maximum openness.
How tall should my displays be in a 10×10 booth?
Keep most displays under 5 feet tall so customers can see across the booth. Use one 6-foot tall display as a focal point in the back corner. Avoid 7-foot tall displays that block sightlines.
Do I need a cash wrap table in my 10×10 booth?
Yes, you need a dedicated checkout spot near the exit. A small 2-foot wide table with a card reader works perfectly. Never process payments at your main display table.
Can two vendors share a 10×10 craft booth?
Two vendors can share if each takes a 5×10 half or uses a split layout. Place a 4-foot tall divider down the middle for separate branding. Each vendor needs their own cash wrap and seating area.
What flooring works best for a 10×10 craft booth?
Interlocking foam mats or indoor-outdoor carpet tiles provide comfort and grip. Avoid loose rugs that create tripping hazards. Dark gray or black flooring hides dirt from foot traffic.
How do I light a 10×10 craft booth properly?
Use four battery-powered LED spotlights aimed at different product zones. Add a string of warm white fairy lights across the ceiling for ambiance. Avoid one central overhead light that creates harsh shadows.
What is the biggest mistake vendors make with 10×10 layouts?
The biggest mistake is overfilling the booth with too many products and too little walking space. Cluttered booths scare away customers who feel trapped. Always leave one clear path from entrance to exit.
Conclusion
Your 10×10 craft booth layout determines your sales success more than your products do. These 25 10×10 craft booth layout ideas give you a proven strategy for any craft category or show type.