Building your own playground saves money and creates a unique space for kids. You can use simple tools and recycled materials to craft amazing structures. This guide lists 25 do it yourself playground ideas that are safe, creative, and easy to build.
A Simple Tire Swing

Find an old tire and clean it thoroughly with soap and water. Drill three holes at equal distances around the tire’s sidewall. Thread a strong rope through each hole and tie them together at the top.
Hang the swing from a sturdy tree branch using a heavy-duty eye bolt. Make sure the branch is at least 10 feet high and free from cracks. The tire should sit about 18 inches above the ground for easy mounting.
Kids love the gentle rocking motion of a tire swing. It encourages cooperative play when two children ride together. Check the ropes and knots every month for wear and tear.
A Wooden Sandbox with Benches
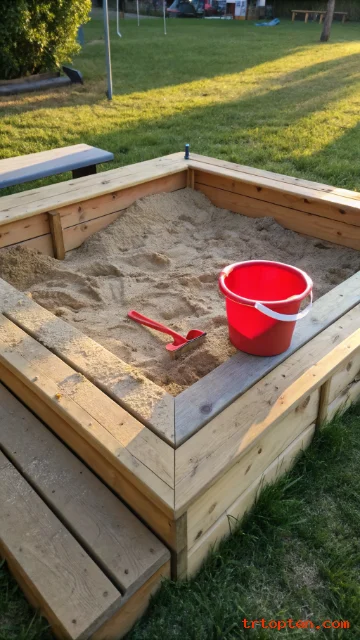
Cut four pieces of untreated lumber into 4-foot lengths for the sandbox walls. Arrange them into a square and screw the corners together with galvanized screws. Add a second layer of boards to create a deeper play area.
Nail bench seats along the top edges of two opposite sides. Use smooth cedar planks that won’t splinter. The benches give parents a spot to watch and kids a place to build sandcastles.
Fill the box with play sand that contains no crystalline silica. Cover the bottom with landscape fabric to prevent weeds. A simple wooden lid on hinges keeps animals out at night.
A Log Balance Beam
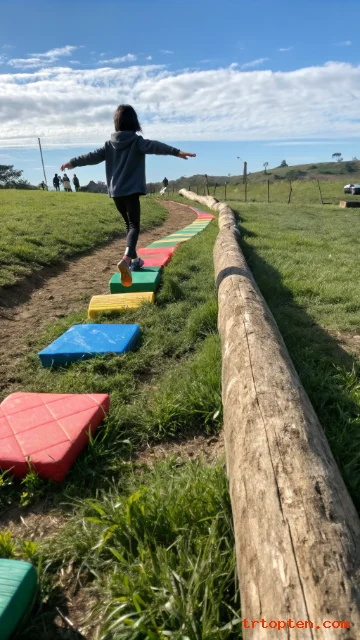
Find a straight fallen log about 8 feet long and 6 inches thick. Lay it flat on the ground in a grassy area. Dig shallow trenches under the log to keep it from rolling.
Sand the top surface smooth to remove splinters and rough bark. You can also use a treated 4×4 post as an alternative. Place old tires or foam mats around the beam for soft landings.
Children walk heel-to-toe to test their balance and coordination. This simple setup teaches body control without any complicated tools. Change the log’s position every few weeks to keep the challenge fresh.
A PVC Pipe Water Wall
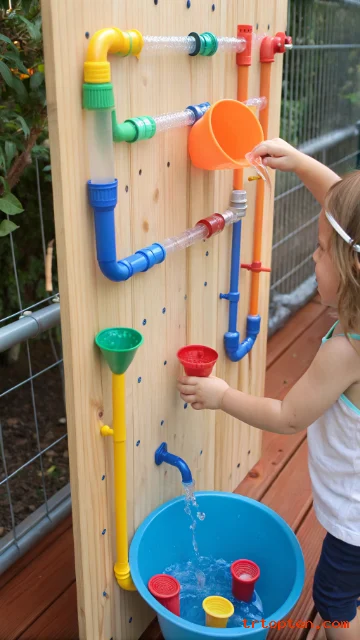
Cut several PVC pipes into different lengths from 1 to 3 feet. Attach them vertically to a wooden board using plastic zip ties. Add funnels, bottles, and tubes at the top for pouring water.
Mount the board against a fence or on two wooden posts set in concrete. Place a large plastic basin at the bottom to catch the water. Kids pour cups of water into the top funnels and watch it flow down.
This activity teaches gravity, flow rates, and cause-and-effect. Use food coloring to make the water more exciting. Drain and clean the system weekly to prevent mold.
A Rope Climbing Net
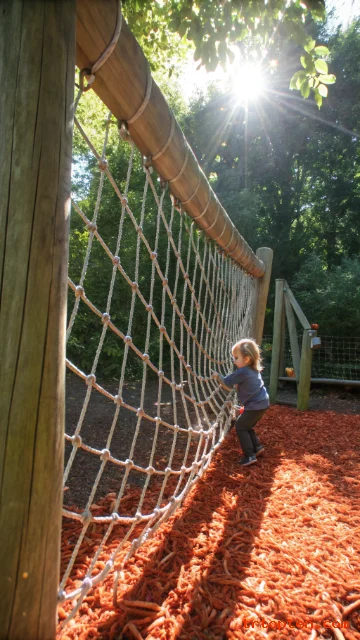
Buy a ready-made cargo net or weave your own with thick nylon rope. Attach the net’s top corners to a sturdy overhead beam or tree branch. Secure the bottom corners to ground stakes about 4 feet apart.
Space the rope knots every 8 inches to make climbing easy for small hands. Pull each knot tight and melt the rope ends with a lighter to prevent fraying. Place thick rubber mulch underneath for safety.
Children learn upper body strength and problem-solving as they find footholds. Two kids can climb different sections at the same time. Inspect every knot monthly for loosening or wear.
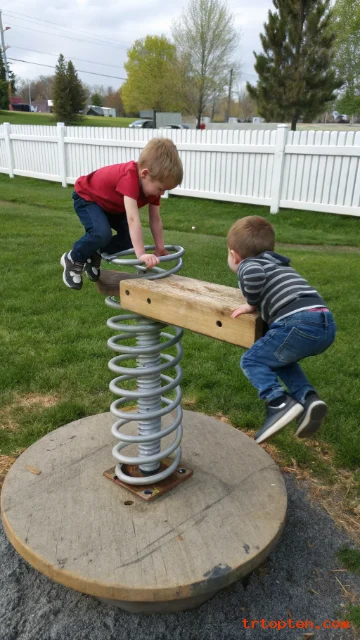
A Teeter Totter from a Spring

Take a heavy-duty car coil spring from a scrap yard. Weld or bolt a flat metal plate to the top of the spring. Attach a wooden plank seat to the plate with strong brackets.
Bury the spring’s bottom in a concrete-filled tire for stability. The tire base keeps the seesaw from tipping over. Make sure the plank has handles cut into its sides.
One child sits on each end and bounces up and down. The spring provides a smooth, bouncy ride that traditional seesaws lack. Limit total weight to 100 pounds for safety.
A Mud Kitchen with Old Pallets
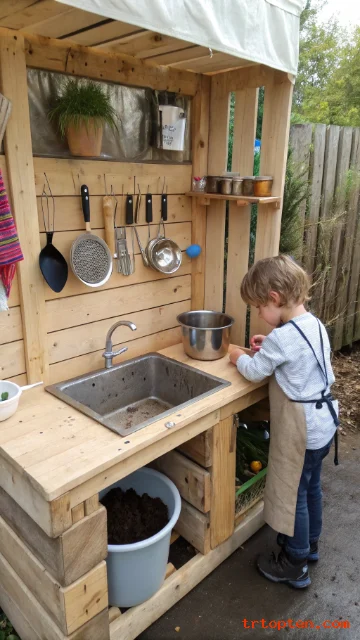
Break down two wooden pallets to get planks for the counter and shelves. Build a low table frame at 24 inches tall. Leave a hole in the counter for an old sink basin.
Hang utensils, pots, and pans on hooks attached to a pallet backboard. Add real kitchen tools like wooden spoons, measuring cups, and muffin tins. Place a bucket of water and a pile of dirt nearby.
Kids mix mud pies and pretend to cook delicious meals. This open-ended play builds creativity and fine motor skills. Cover the kitchen with a tarp when rain is forecast.
A Spinner Bowl from a Metal Dish
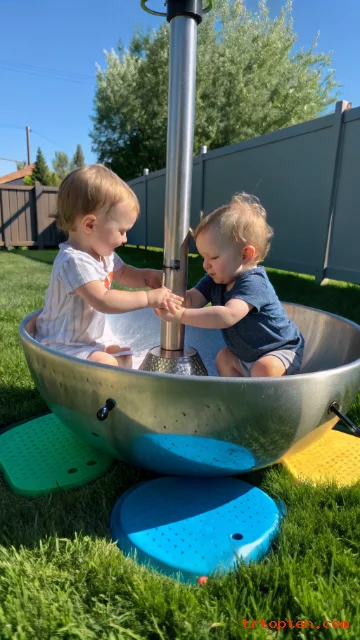
Find a large, smooth metal bowl at a farm supply store. Weld a steel pipe to the center of the bowl’s underside. Insert the pipe into a ground sleeve filled with concrete.
Grease the pipe so the bowl spins freely without wobbling. The bowl should sit just 6 inches above the ground. Two or three small children can sit inside and spin slowly.
This DIY merry-go-round costs almost nothing to build. Supervise spinning to prevent dizziness or falls. Add foam padding around the bowl’s outer edge for extra protection.
A Tic-Tac-Toe Board on a Tree
Paint a large tic-tac-toe grid onto a flat tree trunk using outdoor acrylic paint. The grid squares should be 12 inches wide. Make X and O pieces from round wood slices or plastic lids.
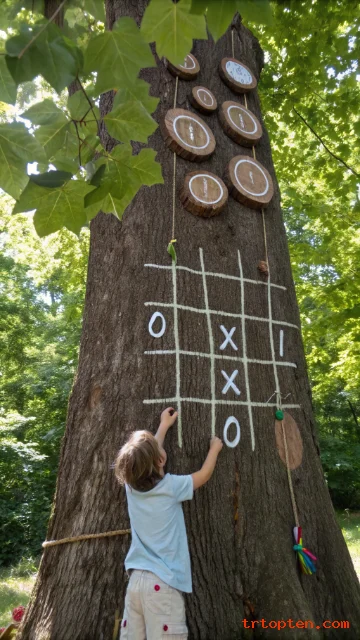
Attach small hooks or nails below the grid to hold the game pieces. Children can stand on the ground and reach every square easily. The tree becomes a giant game board for everyone.
This idea turns a simple tree into an interactive puzzle. It teaches strategy and turn-taking without any screens. Repaint the lines every spring to keep them bright.
A Tunnel from Cardboard Boxes
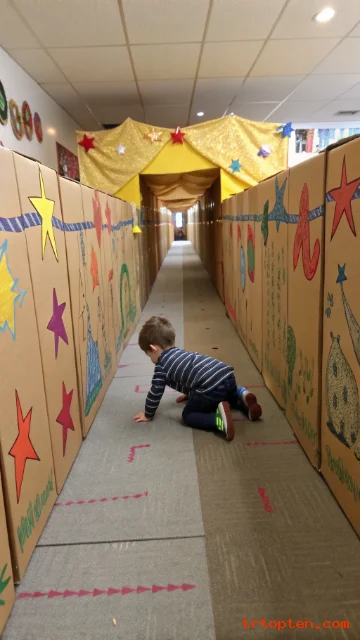
Save large appliance boxes from a local store. Tape them end to end to form a tunnel at least 12 feet long. Cut circular openings in the sides for peeking and crawling out.
Decorate the outside with non-toxic paint or markers. Draw bricks, windows, or animal prints on the cardboard. The tunnel collapses flat for storage when not in use.
Young kids love crawling through dark, cozy spaces. This temporary structure sparks imagination for caves, trains, or rockets. Replace the boxes when they get soggy or torn.
A Tire Obstacle Course
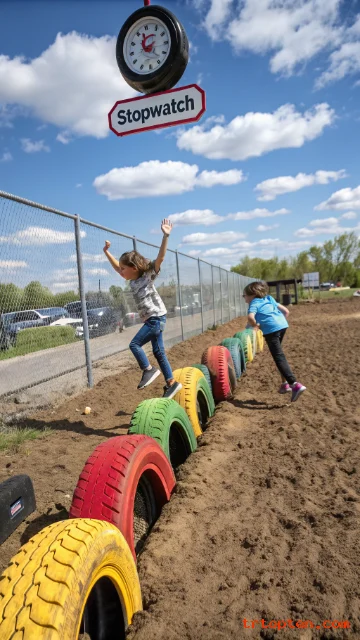
Collect five to seven old tires of the same size. Arrange them in a zigzag line on flat ground. Bury each tire halfway into the soil so they do not tip.
Space the tires 2 feet apart from center to center. Kids step from one tire opening to the next. Add a second row for hopping challenges with both feet together.
This course improves agility, balance, and gross motor planning. Time each child to add a friendly competitive element. Repaint the tires in bright colors for visual appeal.
A Pallet Climbing Wall
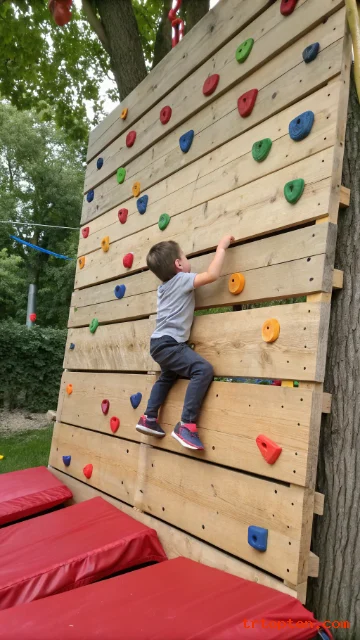
Cut a wooden pallet into a 4×4 foot square. Screw painted wooden handholds and footholds onto the pallet face. Angle the wall at 45 degrees using hinged legs.
Lag bolt the top of the wall to a sturdy tree or post. The angle makes climbing safe for beginners. Use different shapes for holds to add variety.
Children pull themselves up using only the holds. This builds finger strength and confidence in a controlled way. Place crash mats at the bottom of the wall.
A Water Blaster Station
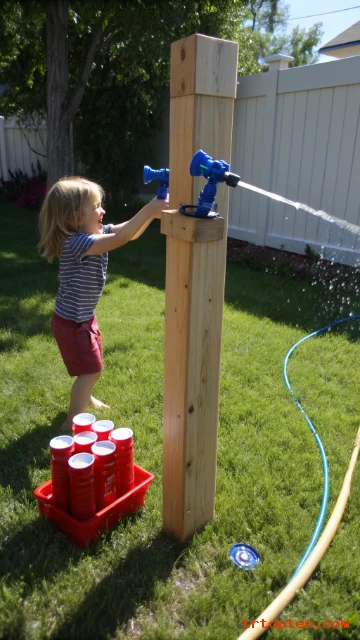
Connect a garden hose to a Y-splitter valve. Attach two plastic spray nozzles to the splitter outputs. Mount the nozzles to a wooden post at kid height.
Add a foot pedal or push-button valve for easy on/off control. Kids point the nozzles at targets like plastic cups or floating toys. The water pressure stays low for gentle spraying.
This station provides hours of wet fun on hot days. It teaches hand-eye coordination and sharing. Drain the hoses after each use to prevent algae growth.
A Rope Swing with a Wooden Seat
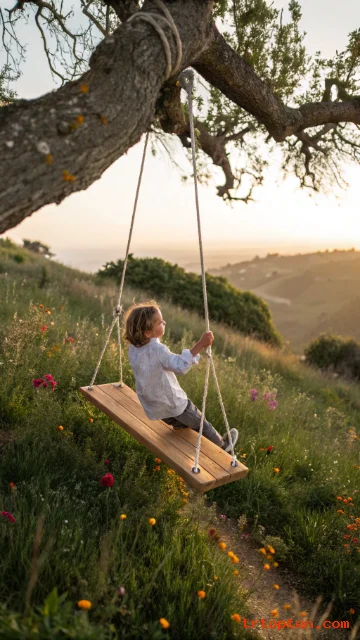
Drill two holes into a flat wooden board 12 inches long and 6 inches wide. Thread two ropes through the holes and tie strong knots underneath. Hang the ropes from a high branch at least 12 feet apart.
The seat should hang 24 inches above the ground. A wider seat gives more stability than a single rope. Sand the board’s edges and corners until completely smooth.
Kids sit or stand on the board while swinging forward and back. This classic design never fails to entertain. Check the branch for cracks after every storm.
A Music Wall with Kitchen Items
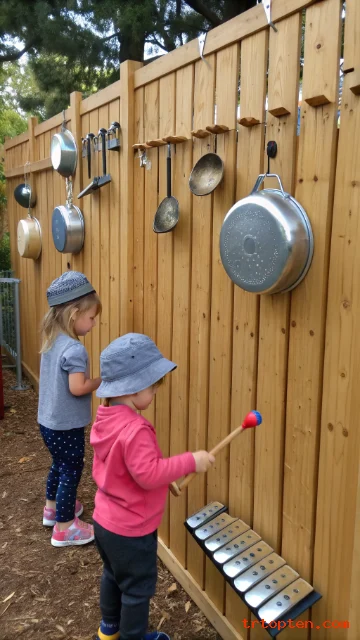
Collect old pots, pans, lids, and metal spoons. Screw them onto a wooden fence or playhouse wall at varying heights. Arrange the items so they can be hit with mallets or hands.
Add a xylophone made of different pipe lengths. Attach bottle caps to a board as tiny cymbals. The wall becomes a noisy but wonderful orchestra.
Children experiment with rhythm, pitch, and volume naturally. This sensory activity helps auditory development and cause-and-effect learning. Remove any sharp edges before play.
A Slackline for Balance
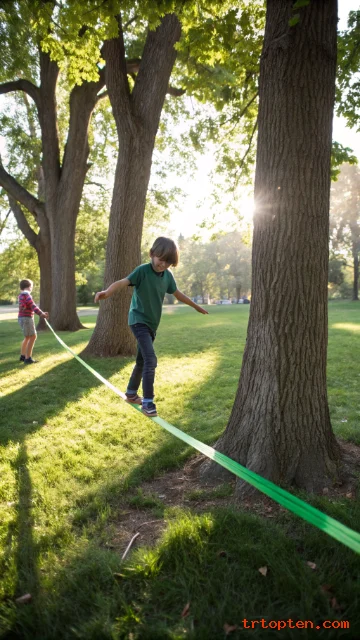
Buy a 15-foot slackline kit or use strong nylon webbing. Anchor the line between two trees that are 10 feet apart. Keep the line only 12 inches off the ground at the center.
Tension the webbing with a ratchet until it feels firm but not tight. Kids walk sideways or forwards while holding a helper’s hand. The slight bounce makes balancing a fun challenge.
Slacklining improves core strength and concentration faster than a static beam. It also prepares children for more advanced sports like skateboarding. Lower the line to 6 inches for beginners.
A Shade Sail Fort
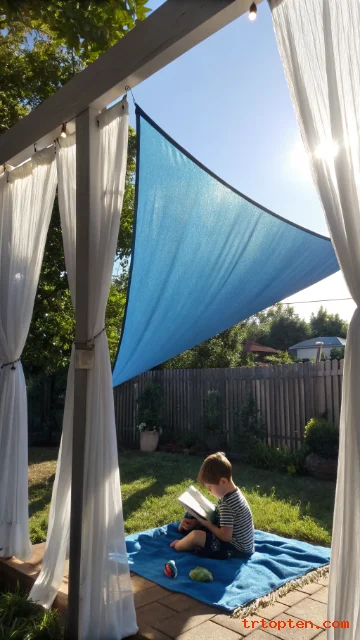
Attach four eye bolts to existing fence posts or trees. Buy a triangular shade sail from a home improvement store. Hook each corner of the sail to an eye bolt with carabiners.
Adjust the sail’s height to be just above adult head level. The fabric blocks 90% of UV rays while letting breezes through. Hang lightweight curtains or sheets from the edges for walls.
This fort stays cool even on the hottest afternoons. Kids bring pillows and books inside for a quiet retreat. Take down the sail before heavy winds or snow.
A Digging Pit with a Sand Pulley
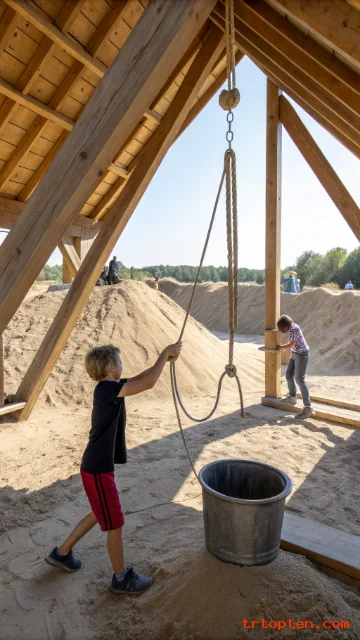
Dig a shallow pit 4 feet wide and 2 feet deep. Line it with landscape fabric and fill with pea gravel or coarse sand. Build a simple A-frame over the pit using 2×4 lumber.
Attach a fixed pulley to the top of the frame. Run a rope through the pulley and tie a small bucket to one end. Kids pull the rope to lift sand and move it around.
This setup mimics construction site play in a safe way. The pulley teaches mechanical advantage and simple machines. Cover the pit when not in use to keep animals out.
A Gourd Bird Feeder Viewing Area
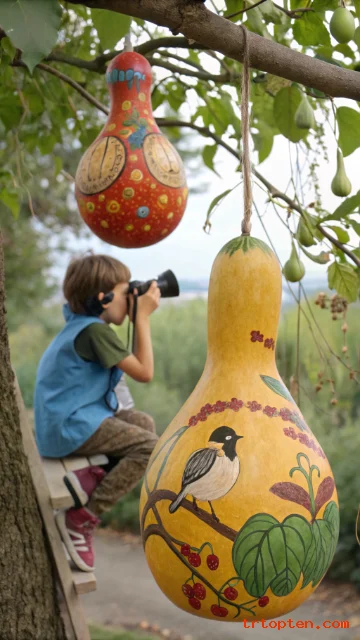
Hollow out several dried gourds to make bird feeders. Paint them with bright, non-toxic colors. Hang them from low tree branches around your playground.
Fill the gourds with sunflower seeds and suet. Place a small bench or log nearby for children to sit and watch. Birds like chickadees and finches will visit daily.
Kids learn patience and observation skills while birdwatching. This activity connects playground time with nature studies. Clean the gourds every two weeks to prevent disease.
A Chalkboard Wall on a Fence
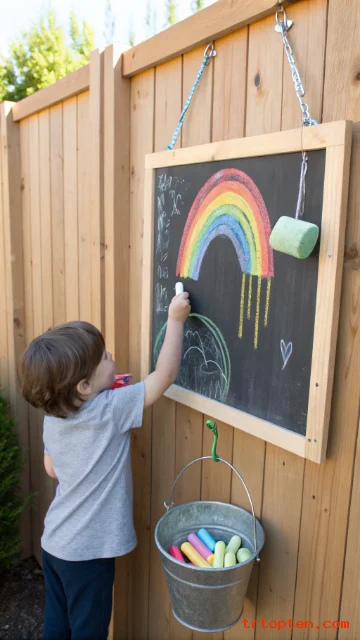
Paint a large rectangle of chalkboard paint onto a flat fence section. Use painter’s tape to create a clean, straight border. Apply three thin coats for a durable surface.
Store a bucket of colorful sidewalk chalk on a hook nearby. Attach a felt eraser to a string so it never gets lost. Kids draw roads, houses, and imaginary worlds daily.
This vertical drawing surface saves driveway space and inspires creativity. It also encourages large arm movements for gross motor practice. Wash the board with water every few weeks.
A Step Stool Race Track
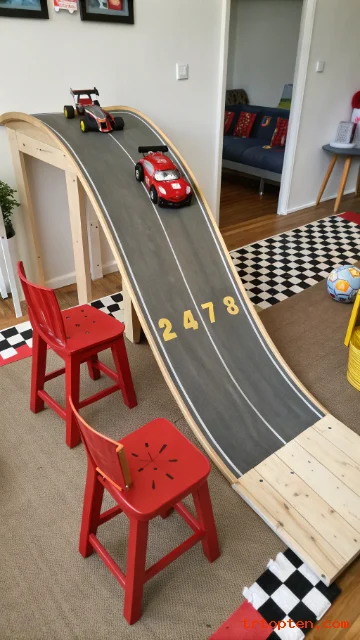
Cut plywood into a long, winding racetrack shape. Paint lane lines and a start/finish line on the track. Elevate the track on low stools or cinder blocks.
Kids race small toy cars down the sloped track. Adjust the slope angle by changing stool heights. Add cardboard tunnels and jumps for extra thrills.
This project uses scrap wood and takes only an afternoon. It promotes friendly competition and fine motor control. Store the track flat under a bed or sofa.
A Straw Bale Climbing Structure
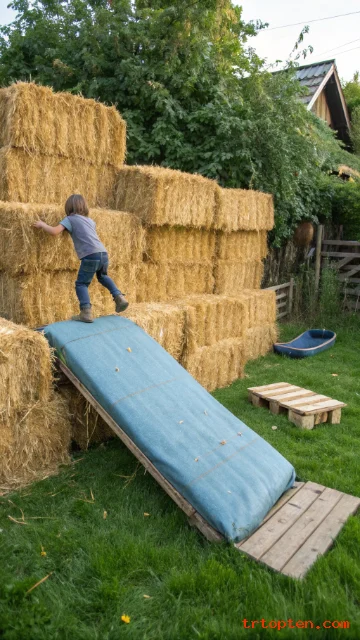
Stack 10 to 15 straw bales into a pyramid shape. Stagger the bales like bricks for stability. Tie the bales together with twine through the middle layers.
Cover the top bale with an old mattress to soften landings. Kids climb from bale to bale like a gentle mountain. The straw provides a soft, forgiving surface.
Replace the bales each year because they decompose. This temporary structure costs very little and requires no tools. Add a slide board from the top bale to the ground.
A Rain Gutter Ball Run
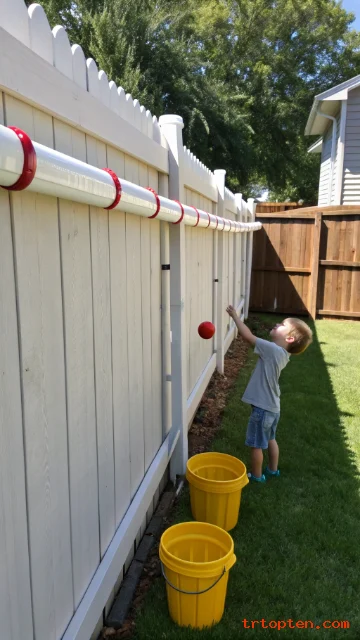
Cut plastic rain gutters into 3-foot sections. Attach them to a fence or wall at slight downward angles. Position the gutters so a ball drops from one to the next.
Use zip ties or small screws to hold each gutter piece. Place a bucket at the bottom to catch the balls. Kids drop golf balls or marbles into the top gutter.
This Rube Goldberg-style game teaches physics and prediction. Children experiment with different gutter angles and lengths. Clear the gutters of leaves before each play session.
A Fabric Swing Nest
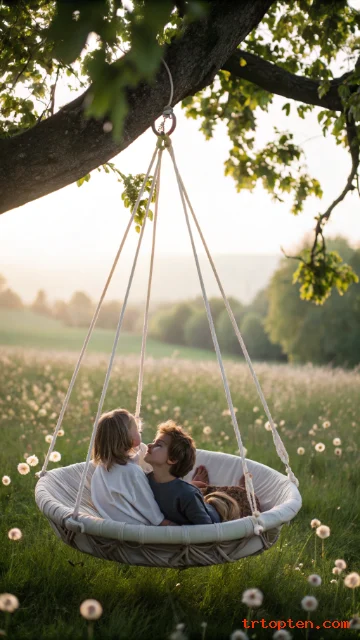
Buy a round metal ring 24 inches in diameter. Sew a strong fabric sling around the ring using canvas or outdoor fabric. Attach three ropes to the ring at equal points.
Hang the ropes from a single swivel hook on a high branch. The nest swings gently like a hammock. One or two children can lie down or sit inside.
This cozy swing feels like a floating bed. It works great for reading or relaxing between active play. Check the fabric for rips every month.
A Jumping Platform with Old Mattresses
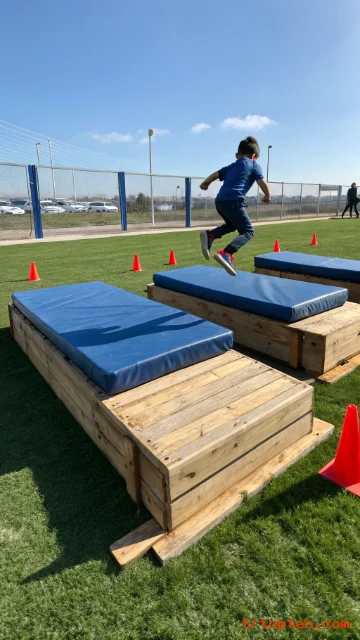
Place two or three old crib mattresses side by side on the grass. Build a low wooden platform 12 inches high next to the mattresses. Use 2×4 lumber and plywood for the platform.
Kids jump from the platform onto the soft mattresses. The mattresses absorb impact much better than foam pads. Make sure the mattresses have no exposed springs.
This setup gives children the thrill of jumping without a trampoline’s risks. It strengthens leg muscles and builds bone density. Replace mattresses after one year of outdoor use.
Are DIY playgrounds safe for toddlers?
Yes, if you follow basic safety rules. Keep structures low to the ground and use soft landing surfaces. Supervise young children at all times during play.
What materials work best for outdoor playgrounds?
Cedar and redwood resist rot naturally. Recycled tires and plastic lumber also hold up well. Avoid treated wood that contains arsenic or copper.
How do I prevent injuries from homemade equipment?
Install at least 6 inches of wood chips, rubber mulch, or sand underneath. Round all sharp corners and remove splinters. Inspect every structure weekly for loose parts.
Can I build these ideas on a small budget?
Yes, most projects use recycled or free materials. Ask neighbors for old tires, pallets, and lumber. Many items cost under $20 to complete.
What is the best ground cover for a DIY playground?
Engineered wood fiber is the top choice for safety. Rubber mats work well under swings and slides. Pea gravel drains quickly but can be hard on knees.
How long do DIY playground structures last?
Wooden items last 3 to 5 years with proper sealing. Tire and PVC projects can last a decade. Cardboard tunnels need replacement every few months.
Do I need permission to build playgrounds in my yard?
Check local zoning laws for detached structures. Most small play items do not require permits. A tall treehouse or large swing set might need approval.
How can I make playgrounds accessible for disabled children?
Widen paths to 36 inches for wheelchairs. Install ramps next to climbing structures. Use sensory elements like music walls and water tables.
What is the easiest first project for a beginner?
The tire swing requires only a drill and rope. The sandbox needs just a saw and screws. Both projects take under two hours to finish.
Should I anchor DIY playgrounds to the ground?
Yes, anchor anything taller than 24 inches. Use ground screws or concrete footings for posts. Unanchored climbing walls and swings can tip over.
Conclusion
These 25 do it yourself playground ideas turn any backyard into a child’s dream destination. You do not need expensive equipment or professional skills to build amazing play spaces.