A walk-in pantry offers incredible storage potential for your kitchen. The right 27 walk in pantry shelving ideas can turn a messy closet into an organized haven. You need practical solutions that fit your space and budget. This post breaks down each idea with clear, actionable steps. Let’s get your pantry in top shape.
Adjustable Wire Shelving
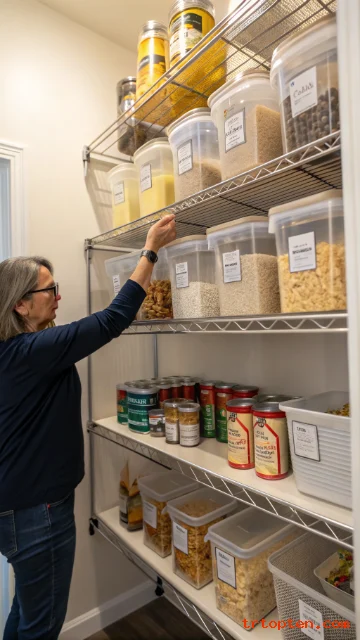
Wire shelving lets you change shelf heights as your needs shift. You can move shelves up for tall cereal boxes or down for short cans. This flexibility makes wire racks a favorite for busy households. The open design improves air flow around stored foods. Air circulation keeps dry goods fresher for longer periods. You will also see items easily without digging through dark corners.
Wire shelves install quickly with basic tools and wall brackets. Most kits include everything you need for a weekend project. You can add more shelves later if your pantry expands. The metal surface is simple to wipe clean with a damp cloth. Spills and dust do not stick to wire like solid wood. This low-maintenance feature saves you time each week.
Pair adjustable wire shelves with clear bins for extra organization. Bins prevent small items from falling through the gaps. You can label each bin for quick identification during meal prep.
Solid Wood Floating Shelves
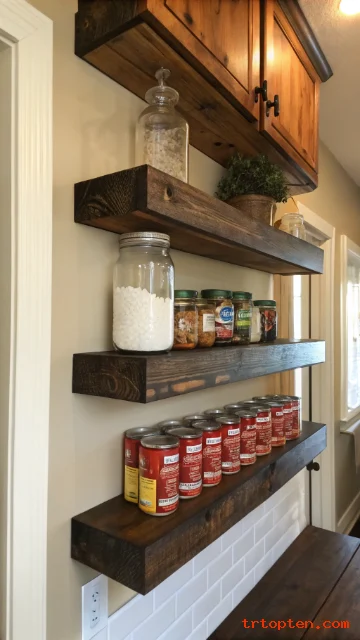
Floating shelves create a warm, farmhouse look in your pantry. You mount them directly into wall studs for a clean, bracket-free appearance. These shelves work best for lighter items like bread and snack packs. The thick wood surface holds heavy jars without bending over time. Oak, pine, and maple are excellent choices for durability. You can stain or paint them to match your kitchen cabinets.
Install floating shelves with a level and a stud finder for safety. Each shelf needs two or three heavy-duty anchors hidden inside the wood. The hidden hardware gives that “floating” illusion you want. Space shelves 12 to 16 inches apart for standard pantry goods. Tall bottles need more room between levels. Short spice jars can sit on tighter spacing.
Use the lowest floating shelf for heavy canned vegetables. Reserve the highest shelf for infrequently used holiday platters. This zoning strategy maximizes your vertical space efficiently.
Pull-Out Drawer Shelves
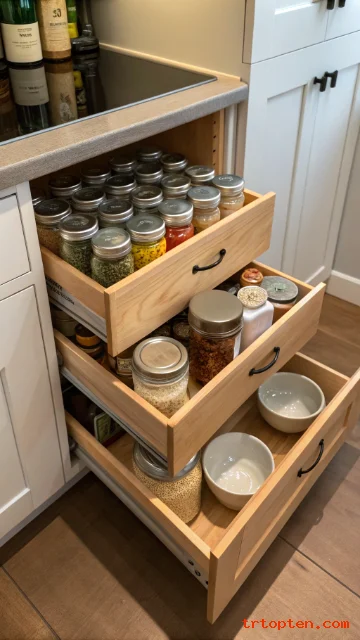
Pull-out drawers turn deep pantry corners into accessible storage. You slide the drawer forward to reach items at the very back. This design stops food from getting lost and expiring unseen. Each drawer glides on full-extension ball-bearing slides. These slides hold up to 100 pounds of canned goods. You can install them in existing shelving cavities with minor modifications.
Build or buy drawers that match your pantry’s width and depth. Standard depths range from 18 to 24 inches. Deeper pantries benefit most from this system. Label each drawer’s front with a chalkboard sticker. Write “vegetables” or “broths” for quick meal planning. Change the label anytime your storage needs evolve.
Stack shorter drawers for spices and taller ones for mixing bowls. The pull-out action keeps everything visible at a glance. You will never push a forgotten jar to the back again.
Corner Diagonal Shelves
Corner spaces often become dead zones in walk-in pantries. Diagonal shelves cut across the corner to make every inch usable. You install these triangular shelves at 45-degree angles. The design provides a flat surface where round turntables can sit. You can also store small appliances like a blender here. The diagonal layout improves access compared to standard corner cabinets.
Measure your corner’s width from wall to wall first. Cut plywood triangles with a 12-inch deep front edge. Mount them with heavy L-brackets screwed into both walls. Leave 14 inches of vertical space between each diagonal shelf. This gap accommodates stand mixers or tall oil bottles. You can add a lip on the front edge to prevent rolling items.
Use the lowest diagonal shelf for root vegetables in mesh bags. The middle shelf works for vinegars and cooking wines. The top shelf holds rarely used punch bowls or vases.
Sliding Ladder with High Shelves
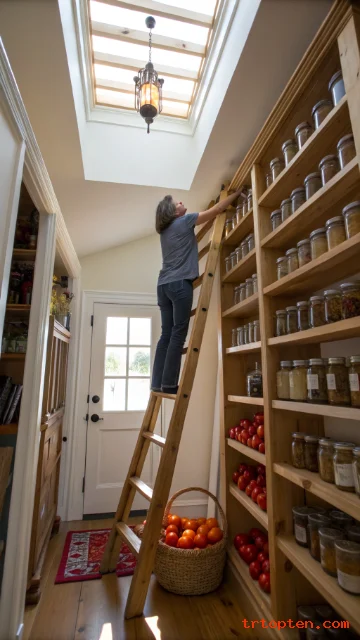
Tall pantries need a sliding ladder for safe top-shelf access. You mount a rail along the upper wall for the ladder to glide on. This system lets you install shelves up to 10 feet high. The ladder rolls smoothly on nylon wheels without scratching your floor. You lock the wheels in place when climbing up. This setup doubles your storage capacity by using vertical space.
Install the ladder rail at least 18 inches from the highest shelf. The ladder itself should have wide, textured steps for grip. Wood or aluminum ladders both work well in pantries. Place seasonal items like canning supplies on the topmost shelf. Holiday cookie tins also belong up high since you use them rarely. Everyday pasta and rice stay on lower, ladder-free shelves.
Attach a small basket to the ladder for carrying multiple items. You can slide the ladder to any section of your pantry in seconds. This idea transforms a simple closet into a library-style food archive.
Glass Front Cabinet Shelves
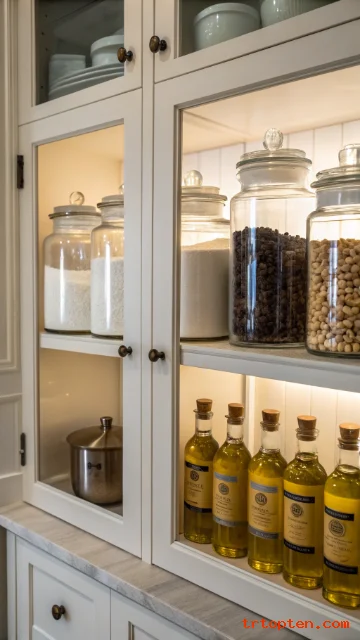
Glass-front doors add elegance while hiding pantry clutter. You install these doors over standard wood shelves. The glass lets you see food inventory without opening the cabinet. This reduces the time you spend searching for ingredients. Choose clear glass for a modern look or frosted glass for privacy. Frosted glass still shows light but obscures messy stacks.
Mount the doors on soft-close hinges to prevent slamming. Each door needs a simple knob or handle for easy pulling. You can order custom sizes to fit your existing shelf openings. Inside the cabinet, use uniform containers for a cohesive appearance. Matching jars of flour, sugar, and coffee look beautiful behind glass. This visual order reduces stress when cooking.
Leave one section without glass for frequently used items. You grab cooking oil and salt from this open area daily. The glass sections protect less-used specialty flours and grains from dust.
Pegboard Backing for Hanging Storage

Pegboard turns your pantry walls into customizable hanging space. You attach a 4×8 foot pegboard sheet to the back wall. Then insert pegs and hooks to hold lightweight baskets and tools. This system keeps measuring cups and spoons off your shelves. You can reconfigure the layout whenever your storage needs change. The perforated board comes in white, black, or natural wood colors.
Install the pegboard with 1-inch spacers behind it. The gap allows hooks to pass through completely. You will need a saw to cut the board around electrical outlets. Hang small wire baskets for spice packets and seasoning mixes. Hang a magnetic strip for knife storage if your pantry has space. Use cup hooks to hold measuring spoons in plain sight.
Label each peg location with a marker for family members. Everyone knows where to return the vegetable peeler. This wall storage frees up precious shelf space for bulkier items.
Tiered Can Risers
Can risers let you see every label in a single glance. You place these stepped shelves on existing pantry planks. The back row sits higher than the front row. This stadium-style layout shows all your beans and tomatoes at once. You will stop pushing old cans to the back. You will also stop buying duplicate cans by mistake.
Buy plastic or wire risers in 12-inch widths. You can also make your own from scrap wood and glue. Each riser should have three levels for maximum visibility. Arrange vegetables on one riser and fruits on another. Soups go on a third riser for quick weeknight dinners. This system works for any standard shelf depth.
Stack canned fish like tuna on the lowest riser level. Place larger cans of pineapple on the tallest back row. Rotate items from back to front as you use them up.
Deep Pantry Roll-Out Trays
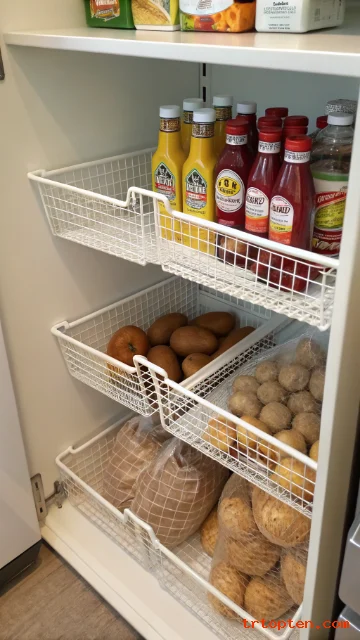
Deep shelves over 24 inches need roll-out tray systems. You mount wire trays on heavy-duty slides inside the shelf cavity. Each tray rolls completely out like a drawer. This design gives you access to the full depth without climbing inside. You can store bulk items like 25-pound rice bags on these trays. The wire construction lets you see what sits underneath.
Measure your shelf depth and width before ordering trays. Standard sizes range from 18 to 30 inches deep. You need at least 2 inches of clearance on each side. Install the slides first into the shelf’s side walls. Then click the trays onto the slides. Add a handle to each tray for easy pulling.
Use the bottom tray for potatoes and onions in ventilated bins. The middle tray stores backup ketchup and mustard bottles. The top tray holds rarely used specialty oils and vinegars.
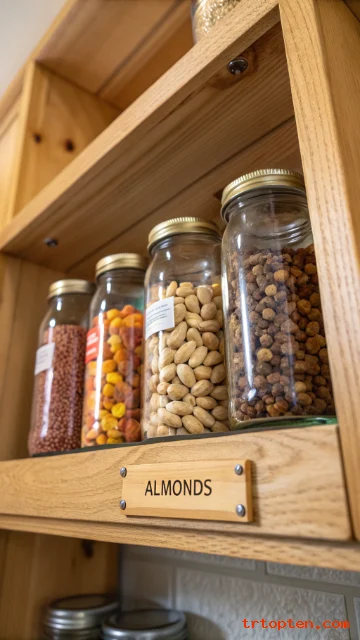
Mason Jar Screw-Top Shelves
Mason jar lids screw directly into wooden shelf bottoms. You fill jars with dry goods and twist them up into the lids. This upside-down storage keeps contents airtight and pest-free. The jars hang below the shelf, saving upper surface space. You can see the food through the clear glass sides. This clever idea works best for nuts, seeds, and dried herbs.
Drill holes into a 1×4 wood board to match jar lid sizes. Use standard wide-mouth lids for pint and quart jars. Screw each lid into the board with small bolts. Then mount the board under an existing shelf. Fill each jar, screw it into the lid, and you are done. The jars will not fall if you tighten them properly.
Label the jar bottoms with chalkboard stickers. Write “walnuts” or “chia seeds” for easy identification. Replace empties by unscrewing and refilling from the bottom.
Sliding Barn Door Pantry Shelves
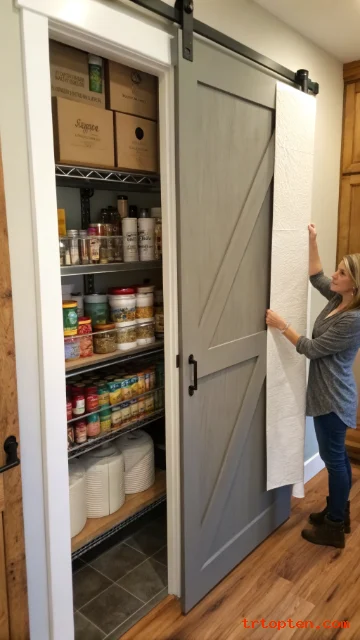
A sliding barn door on a track can hide or reveal pantry shelves. You mount the door outside the pantry opening. Inside, you install floor-to-ceiling shelving on three walls. The door slides left or right to expose different shelf sections. This design works for shallow pantries under stairs. The rustic look adds character to any kitchen.
Build the door from solid pine or reclaimed wood. The track needs to span twice the door’s width. You will need heavy-duty rollers and floor guides. Inside, use open shelves with no doors at all. The single barn door closes to hide everything. But when open, you see your entire food collection at once.
Store daily items on the section visible when the door is half open. Store bulk paper towels behind the closed door portion. This partial visibility keeps your kitchen looking tidy.
Under-Shelf Hanging Baskets
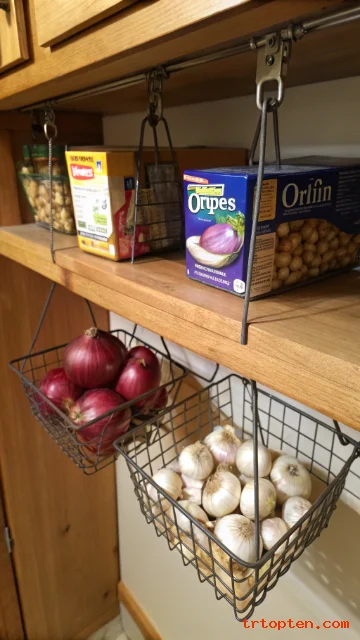
Wire baskets hook directly onto the shelf above. You slide the basket’s lip over the shelf’s front edge. This creates instant storage underneath existing shelves. Use these baskets for lightweight items like snack packs and tea bags. The baskets hang down about 4 inches. You can still access items on the shelf above normally.
Buy baskets in widths from 8 to 18 inches. Each basket should have a flat bottom and curved front lip. The lip keeps items from sliding out when you pull them. Hang baskets under every shelf for maximum efficiency. The lowest shelf’s underside works for root vegetable storage. The highest shelf’s underside holds dried mushroom packets.
Place onions in a mesh hanging basket for air flow. Put garlic in another basket next to it. This vertical stacking doubles your shelf count without construction.
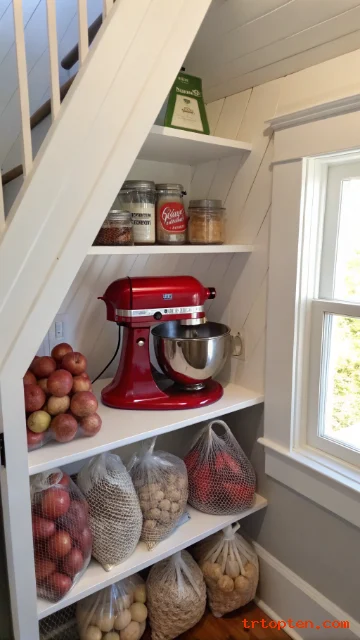
Floor-to-Ceiling Open Shelving
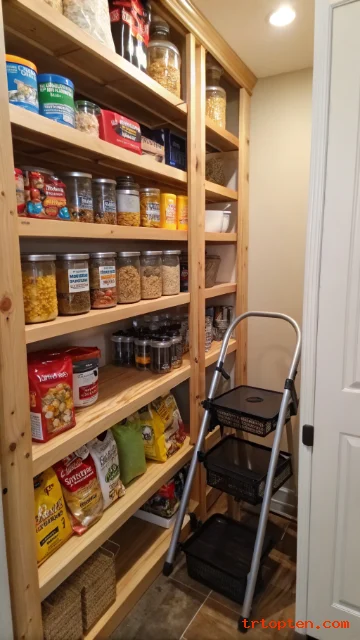
Eliminate wasted space by building shelves from floor to ceiling. You use every vertical inch from the baseboard to the top trim. The bottom shelf sits 6 inches off the floor for cleaning access. The top shelf reaches all the way to the ceiling. This design works in pantries with standard 8-foot heights. You gain at least two extra shelves compared to traditional builds.
Use 2×12 lumber for sturdy, deep shelves. Space them 14 inches apart for most food items. Install a center vertical support for shelves wider than 3 feet. Store heavy cases of soda on the bottom shelf. The low height makes lifting them easy on your back. Store light chip bags and popcorn on the top shelf.
Keep a small step stool in the pantry corner. You will need it for the highest items. This total vertical usage increases storage by up to 40 percent.
Lazy Susan Corner Shelves
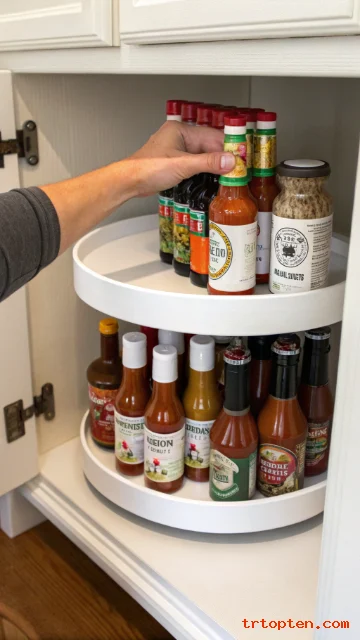
A Lazy Susan turns a corner shelf into a rotating food carousel. You place a round rotating tray on a corner shelf. Then spin it to reach items at the back. This works perfectly for square corner cabinets in pantries. The turntable measures 12 to 18 inches in diameter. You can buy one for under twenty dollars.
Choose a Lazy Susan with a raised lip to stop spills. The lip keeps bottles from rolling off as you spin. Place it on the lowest shelf for heavy jam jars. Put another on the middle shelf for spice bottles. Use a third on the top shelf for small extracts and food coloring. Each shelf gets its own independent turntable.
Organize by category on each rotating tray. One tray holds all your baking extracts. Another tray holds hot sauces and marinades. Spin once to see every option in three seconds.
Wall-Mounted Magnetic Spice Racks
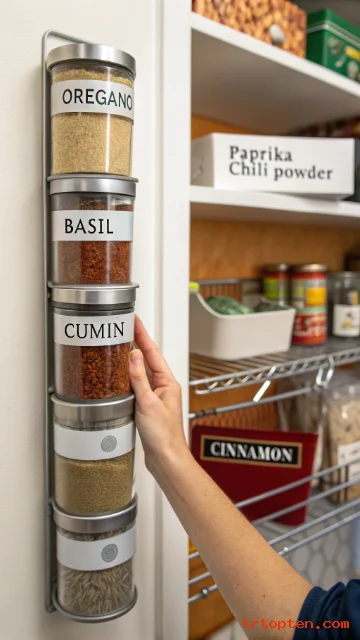
Metal spice tins stick to magnetic strips on pantry walls. You mount a 12-inch magnetic bar vertically or horizontally. Then attach small metal tins filled with spices. The tins stay put until you pull them off. This system frees up entire shelves for larger items. You can see all your spices at eye level.
Buy magnetic bars rated for at least 5 pounds. Use adhesive backing or screw mounts for security. Fill matching square tins with your most-used spices. Label each tin’s lid with a permanent marker. Stick the tins to the bar in alphabetical order. Peel them off when cooking and stick them back after.
Add a second bar for dried herbs on another wall. A third bar can hold small medicine bottles for vitamins. This magnetic solution uses near-zero shelf space.
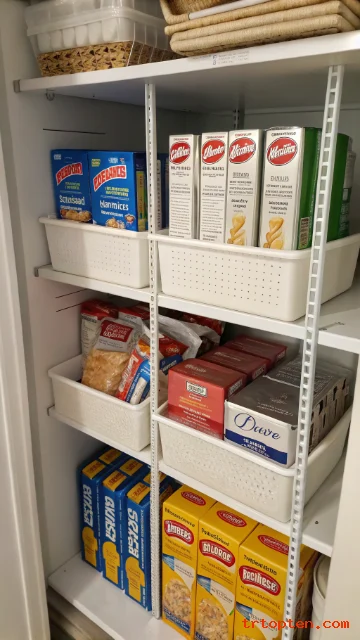
Stackable Clear Plastic Bins
Clear bins turn chaotic shelves into neat, searchable zones. You buy identical bins in two or three sizes. Then stack them on pantry shelves to create vertical storage. The clear walls show contents without opening the lid. You can pull one bin out without disturbing the stack. This system works for snacks, baking mixes, and pasta shapes.
Choose bins with interlocking lids for stable stacking. Each bin should have a handle for easy pulling. Measure your shelf height before buying to ensure fit. Use tall bins for spaghetti boxes and ramen packets. Use short bins for oatmeal packets and pudding cups. Slide the bins forward to access the back shelf area.
Label each bin’s front with a removable sticker. Write “Breakfast” on one bin and “Pasta” on another. Switch labels when your pantry contents change seasonally.
Under-Cabinet Stemware Racks
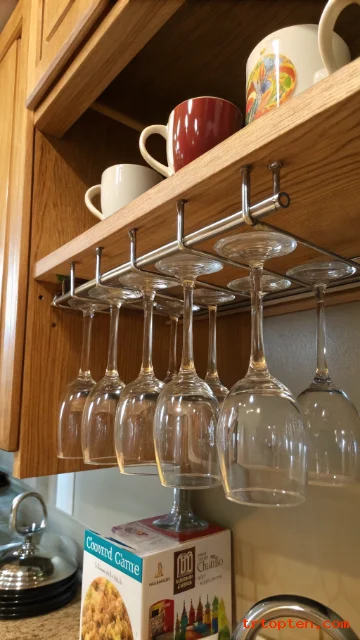
Wine glasses and mugs hang under your pantry shelves. You mount a stemware rack underneath a sturdy shelf. The rack holds glasses upside down by their bases. This keeps them dust-free and ready for dinner parties. The space above the rack stays usable for other items. You gain storage without losing any shelf surface area.
Buy a rack that screws directly into the shelf bottom. Standard racks hold 6 to 12 glasses. Use it for wine glasses, coffee mugs, or even small bowls. Install the rack near the pantry entrance for easy access. The weight of the glasses pulls down on the rack. Make sure your shelf can handle the extra load.
Hang rarely used champagne flutes on one rack. Hang daily coffee mugs on another rack. This vertical solution clears cabinet space for plates and food.
Sliding Wire Baskets on Wall Track
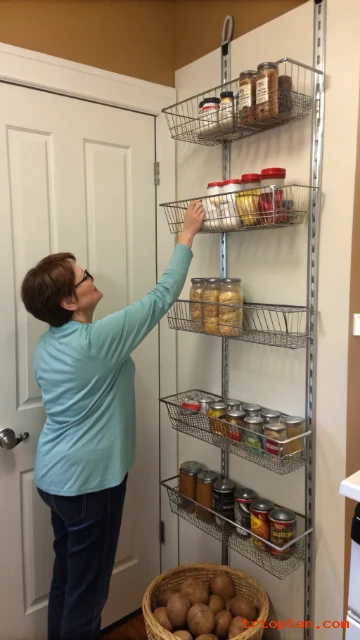
Wall-mounted tracks hold wire baskets that slide vertically. You attach metal tracks to your pantry wall. Then clip wire baskets onto the tracks at any height. Each basket slides up and down independently. This lets you reorganize shelf heights without tools. The system works like a library’s adjustable shelves.
Buy tracks that are at least 6 feet tall. Each track needs wall studs for secure mounting. Clip baskets every 8 inches for maximum density. Use deep baskets for potatoes and onions. Use shallow baskets for spice jars and seasoning packets. Slide a basket up to clean underneath it easily.
Reserve the highest basket for holiday candy molds. Slide it down once a year for baking projects. Slide it back up when you finish to clear lower space.
Repurposed Bookshelf Pantry Shelves

An old bookshelf becomes instant walk-in pantry storage. You place the bookshelf inside your pantry space. Its existing shelves hold canned goods and dry foods. The back of the bookshelf provides a solid surface. You can paint it to match your kitchen colors. This idea costs less than custom carpentry.
Measure your pantry’s width and depth first. Find a bookshelf that fits with 2 inches of clearance. Remove any unnecessary decorative trim for a cleaner look. Turn the bookshelf sideways if it is too tall. The shelves will still function perfectly in a horizontal position. Add shelf liner to prevent can sliding.
Use the bottom shelf for heavy glass jars. Use the middle shelves for boxed pasta and cereal. Use the top shelf for lightweight bread and chips. You just created a pantry-in-a-box.
Tension Rod Divider Shelves
Tension rods create dividers on existing flat shelves. You place spring-loaded rods vertically between two shelf levels. The rods press against the upper and lower shelves. This stops tall items from falling over. You can separate cutting boards or baking sheets this way. The rods cost under five dollars each.
Install rods every 6 to 8 inches across a shelf. Use them to separate different food categories. One section holds pasta boxes, another holds rice bags. The rods keep everything standing upright. You will not have to reorganize after every grocery trip. Pull out one item without toppling its neighbors.
Place rods on a shelf with baking mixes. The mixes stay vertical and easy to read. Place rods on a shelf with foil and plastic wrap boxes. The boxes will not slide into each other.
Hanging Shoe Organizer for Snacks
A clear plastic shoe organizer hangs on your pantry door. Each pocket holds snack-sized food packages. You can see every granola bar and fruit pouch instantly. The over-the-door design uses no shelf space at all. This works for small pantries with limited square footage. The organizer costs less than fifteen dollars.
Buy an organizer with at least 24 clear pockets. Hang it on the inside of your pantry door. Fill pockets with single-serve chips and crackers. Put pudding cups in larger pockets. Store applesauce pouches in the bottom row. The door still closes fully with the organizer in place.
Rotate snacks weekly so older items get eaten first. Kids can grab their own snacks without help. You will stop buying duplicate snack boxes you forgot you had.
Rolling Kitchen Cart with Shelves
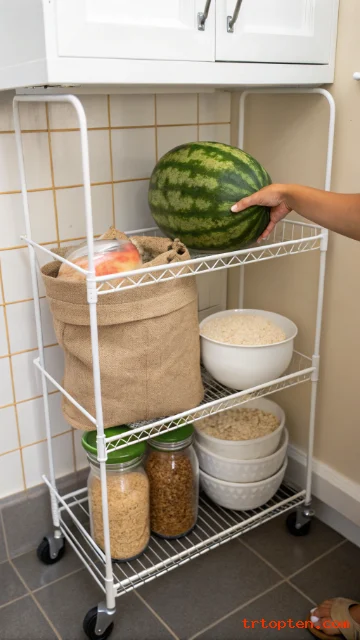
A wheeled cart adds movable shelves to your walk-in pantry. You roll the cart to access items from all sides. The cart’s shelves hold heavy canned goods and jars. You can roll it out of the pantry for holiday cooking. This gives you temporary counter space in the kitchen. The cart returns to the pantry when you finish.
Choose a cart with locking casters for safety. The cart should have three to four open shelves. Metal carts are easier to clean than wood ones. Use the bottom shelf for watermelon or squash. Use the middle shelf for bulk bags of rice. Use the top shelf for mixing bowls and colanders.
Roll the cart next to your stove during meal prep. Grab ingredients from every shelf quickly. Roll it back into the pantry when dinner is done.
Wall-Mounted Canning Jar Racks
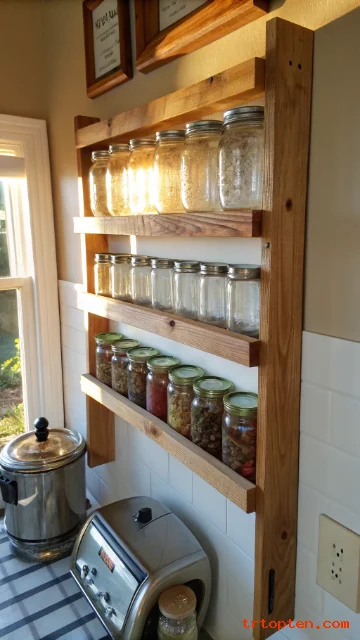
Wooden racks hold mason jars by their lids on the wall. You mount a rack with precut holes to fit jar mouths. Each hole holds one jar upside down by its lid. This keeps jars sterile and ready for canning season. The visible jars look like kitchen decor. You free up shelf space for other pantry items.
Build a rack from 1×4 pine board. Drill holes spaced 3 inches apart. The holes should match wide-mouth or regular lid sizes. Mount the rack horizontally on an empty wall. Screw empty jars into the holes by their lids. The jars will hang securely until you need them.
Place a second rack for smaller 4-ounce jars. Use these for homemade jams and pickles. The rack displays your canning hobby beautifully.
Pull-Down Shelves for High Spaces
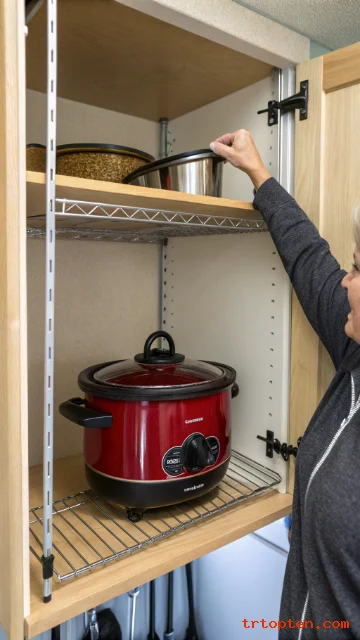
High shelves become usable with pull-down mechanisms. You install a spring-loaded shelf that lowers to your height. Pull a handle, and the shelf glides down on metal arms. Release the handle, and it locks at your chest level. This lets you store heavy items up high safely. The mechanism holds up to 50 pounds.
You need at least 15 inches of clearance below the mechanism. The shelf itself measures 24 inches wide by 12 inches deep. Install it on the topmost shelf position. Store your slow cooker or stand mixer on this shelf. Pull it down when you need the appliance. Push it back up after cleaning.
Use the pull-down shelf for seasonal bakeware. Christmas cookie sheets live here most of the year. Lower them once in December for holiday baking.
Chalkboard Label System on Cans
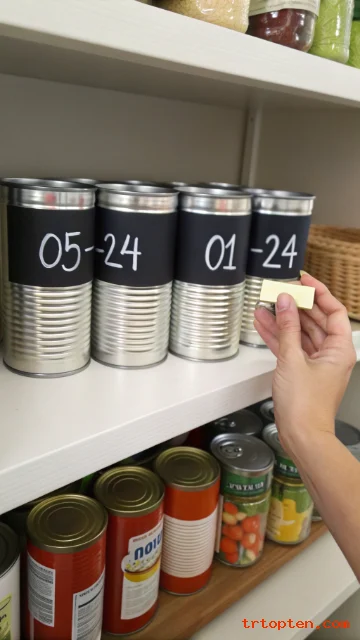
A chalkboard label on every can shows its purchase date. You stick chalkboard stickers onto the sides of cans. Write the month and year with chalk. Erase and rewrite when you rotate stock. This stops expired food from hiding in your pantry. You will eat older cans before opening new ones.
Buy chalkboard stickers in 2-inch circles. Apply them to the front of each can. Keep a small chalk piece near your pantry. Write “03-24” on beans bought in March 2024. Write “06-24” on tomatoes from June. Arrange cans in order of expiration date.
Use this system with any can riser or shelf. You will see at a glance which cans need using first. No more mystery cans at the back of the shelf.
Corner Hanging Pot Rack
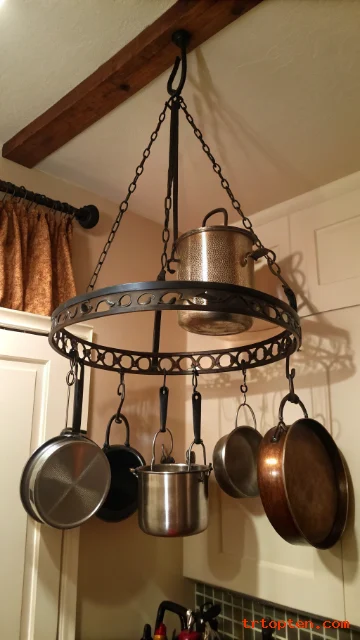
A pot rack hangs in the corner of your walk-in pantry. You mount it from the ceiling at a 45-degree angle. The rack holds pots, pans, and cast iron skillets. This frees up lower shelves for food storage. The corner space otherwise goes unused. You can also hang measuring cups from S-hooks.
Choose a wrought iron rack for heavy cookware. The rack should measure 24 inches along each wall. Install it at least 6 feet from the floor. Hang your largest stockpot in the center. Hang smaller saucepans around the outside. The rack keeps cookware visible and accessible.
Store pot lids on a separate hanging rail nearby. You will never dig through cabinets for the right pan again. The corner rack turns dead space into functional storage.
Built-In Wine Rack Shelves
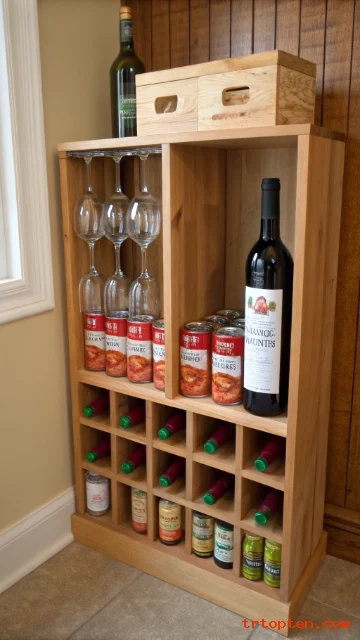
Combine wine storage with pantry shelving for efficiency. You build shelves with built-in wine cubbies at the base. The cubbies hold bottles horizontally to keep corks wet. Above the cubbies, standard shelves hold dry goods. This single unit stores both food and beverages. You save space by merging two storage zones.
Design cubbies that are 3.5 inches wide and 12 inches deep. Each cubby holds one standard wine bottle. Build a row of 6 to 12 cubbies at the bottom. Install regular shelves above for cans and boxes. Use the very top shelf for wine glasses. This becomes your entertaining station.
Store red wines in the left cubbies and whites on the right. Keep cooking wines in the middle cubbies. Grab a bottle while grabbing pasta sauce from above.
What is the best depth for walk-in pantry shelves?
Standard pantry shelves work best at 12 to 16 inches deep. This depth lets you see all items without burying things in the back. Deeper shelves need pull-out trays or roll-out systems for access.
Can I install pantry shelving myself without a contractor?
Yes, most shelving systems come with DIY-friendly instructions. Basic tools like a drill, level, and stud finder are all you need. Start with adjustable wire shelves for the easiest installation.
How much weight can floating shelves hold in a pantry?
Floating shelves anchored into wall studs hold up to 50 pounds. Drywall anchors alone hold only 10 to 20 pounds. Always screw floating shelf brackets into wooden studs for heavy canned goods.
What material is easiest to clean for pantry shelves?
Wire shelving is the easiest to wipe down and air dries quickly. Laminate shelves also clean well with a damp sponge. Avoid unfinished wood because it absorbs spills and stains.
How do I organize a small walk-in pantry with odd angles?
Use corner diagonal shelves to square off awkward spaces. Hang over-door organizers for snacks and spices. Install pegboard on angled walls for flexible hanging storage.
Should I use open or closed shelving in my pantry?
Open shelves make finding food faster and cost less money. Closed cabinets hide mess but require opening doors to see contents. A mix of both works best for most homes.
How high should pantry shelves be spaced apart?
Standard spacing is 12 to 14 inches for most food items. Leave 16 to 18 inches for tall cereal boxes and oil bottles. Adjust spacing based on your most common grocery purchases.
Can I add shelving to a rental apartment’s walk-in pantry?
Yes, use freestanding units like rolling carts or bookshelves. Tension rod dividers and over-door organizers leave no permanent marks. Avoid drilling into walls to protect your security deposit.
What is the cheapest way to add pantry shelving?
Repurpose an old bookshelf or buy a wire shelving unit from a hardware store. Plastic storage bins stacked on the floor cost almost nothing. Pegboard and hooks run under thirty dollars for a small wall.
Conclusion
Your walk-in pantry can become a model of efficiency with these 27 walk in pantry shelving ideas. Each solution targets a specific problem like deep corners, high ceilings, or narrow spaces.